|
An Arkansas Junebug
by Phillip B Lea: phillip_lea@yahoo.com
(photos by Mary and Andrea Lea and Steve Korson)
| This boat is ShoeString. It is a modified Bolger-designed Junebug from
the pages of The New Instant Boats.
I built it because I love boat building - I modified it because I love boat design. No
matter what study plans I saw or bought, there was always some little change that I wanted
to make. Bolger’s Junebug design gave me an ideal starting point. It was about the
right size, was a proven rowing and sailing boat, and it allowed me to experiment with
some aesthetic changes with little monetary risk. |
| In 1975 I finished my only other boat - a
Bolger Light Dory Type 5. Justin Pipkorn of Thousand Oaks, California, and I produced a
nice pair of dories - with Justin walking me through every stage of construction.
ShoeString was my second boat and I wanted to try epoxy, try "instant
construction", sew my own sails, and make my own spars. It was to be a
re-introduction into boat building after a 23 year break. |
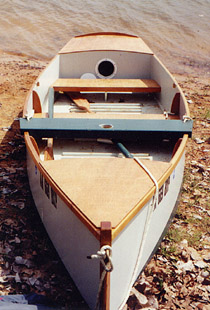
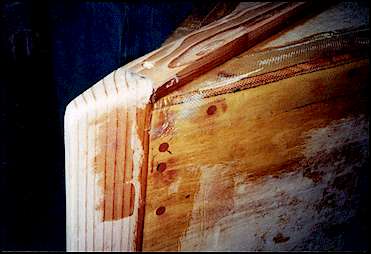
Marking the waterline
I am pleased with how the waterline came out. The
topsides were painted light green first. To make the straight line we leveled the
boat on two sawhorses upside down. This made it easy to level because there are
three easy points to adjust - the top of the stem and two points on the after gunwales.
We leveled with clear tubing partially filled with colored water. Once the
boat was level I walked around the hull while Mary called out whether we needed to adjust
my end up or down, and we marked it every 18" or so. This is very easy on the
vertical sides. I used a flexible aluminum meter stick (yes, a meter stick - left
over from building Bolger's metric Light Dory Type 5) to draw a best fit line.
Again, this is a piece of cake with vertical sides. We flipped the boat, put on some
fresh masking tape on the light green topsides, then we brushed down over the tape and
down onto the unpainted lower side. With the taped edge up, there was no paint
trying to run under the edge. As soon as a side was painted, we pulled the masking
tape off. Made a nice clean line. |
| The most noticeable modifications I made to the plan are
the the raked transom and the raised, more dramatic curve in the sheer (raised fore and
aft). This caused me to use an extra sheet of plywood for construction. I wanted a
bigger boat, and the Junebug is quite narrow, so I widened it 5 inches (about 13%), and
dared no more. I widened the transom and other frame 13% also. I gave my boat an outer
stem for aesthetics. Before committing to these dimensions I lofted the plank line to
ensure it would lie smoothly. |
 |
(On this plumb-sided boat, the chine line is
the gunwale line). I had little to worry about because the frames are so far apart.
The increase in beam provided more floatation aft than forward, so I felt I could rake the
transom, stealing about 2 inches from the after end of the hull bottom. A raked transom in
a plumb-sided vessel makes a transom that is wider at the bottom than at the top. This is
a strong visual departure from the original boxy boat. |
2. My son A.J. helped me get the bottom
on quickly before the epoxy setup. |
I increased the sail area to 66 sq.ft., made a slightly
larger and taller, round mast, raked it slightly aft, moved the hole in the partner 4
inches forward to balance, and built an adjustable mast step to make any needed
corrections after construction. The leeboard is about 4 inches longer. The sail was made
with reef points. |
ShoeString has watertight compartments, with inspection covers and cambered decks, fore
and aft. The bulkheads were cut to fit and are epoxied and glass taped in place. Building
the watertight bulkheads and cambered decks was the most time consuming change to the
plans.
|
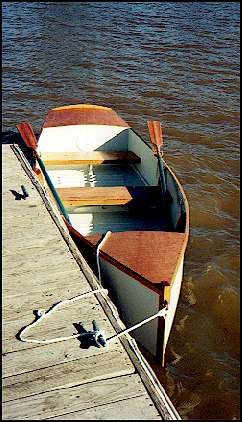
| The oars are stored on centerline under the seats. My
center seat lifts out - it is secured on one edge with a lanyard, the other is captured in
a small frame on the side. There is a vertical slot almost all the way through frame #2 to
hold the oars. I strengthened the bottom of frame #2 with member 1.5" x 2.5",
which is long enough so that its ends go out as far as the two outer bottom skids, and
used heavy fasteners and epoxy. You can see the extra member in photo 11. I wanted to be
able to sail with little interference from the oars, but of course be able to get to them
if the wind died completely. |
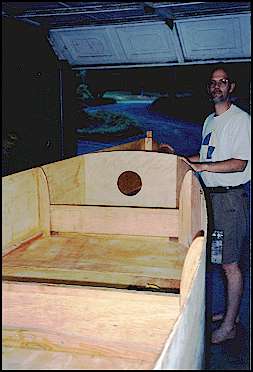
3. The bottom in place and the bulkhead
set in place just prior to taping |
| I built a kick-up rudder like Bolger’s Gypsy. There were no
changes to scantlings, rocker, length, placement of the leeboard, the marvelous sprit rig,
or method of construction. The changes made are only small incremental changes, or else
aesthetic changes that have no great effect on the boat’s performance. The change to
the sheer caused me to buy an extra sheet of plywood, but to me, that was insignificant. |
|
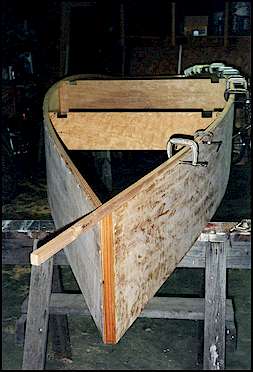
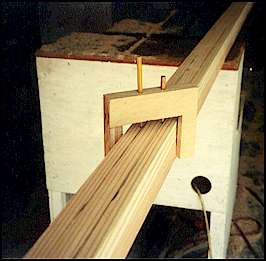
4. Here is the chine going
into place. The after end of the chine is first cut to butt against the raked transom and
then the chine is slowly bent, clamped, and screwed into place. The chine is cut off flush
with the inside of the plumb inner stem. If the cut is perfect, it will snap into place
and butt against the inner stem. If not, fill the gap with epoxy thickened with sawdust
like I did. The plywood planks in this photo had previously had some epoxy squeegeed over
them while they lay flat on the floor. The inner stem’s width was custom cut so that
the thickness of the outer stem (1.5") would just cover both plank edges |
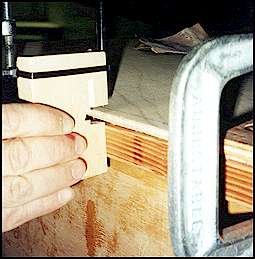
| 5. This picture shows how the center skid
is faired into the outer stem. The outer stem covers the inner stem and the edge of the
planks - is lag-bolted and epoxied to the inner stem. The center skid and outer stem came
after the chine was glass taped. |
 |
|
6. I used a little jig to mark the edge of the plywood deck for trimming.
The deck was cut so that it overlapped a little, was clamped in place, and then the jig
gave a good line around the edge of the deck-the jig held the pencil the desired distance
from the outside of the gunwale. A Bosch power planer made nice clean edges on the
ply. To get my decks watertight, I bedded them on the gunwales with plenty of epoxy
thickened with sawdust, and used bronze ring nails every three inches. The
nail heads remain visible so their desired location was marked before any epoxy was
mixed. The brightwork has two coats of System 3 epoxy clear coat and at least two
coats of spar varnish. |
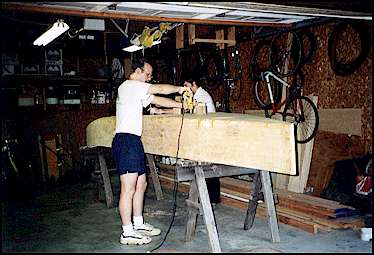
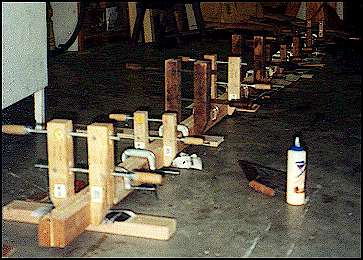
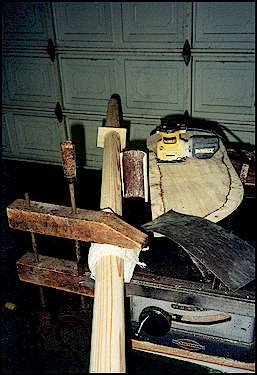
| 7. Here the mast is being
glued with Titebond II. Clamps are spaced about 8 inches apart and make for a heavy
load. To ensure the mast did not develop a bad shape, it was glued while level.
I found the low spots in the floor using a tight string, and then slid scraps of
suitable thickness under the string until they just touched, and left the scraps sitting
in place on the floor. The glue was spread on the mast halves with a notched trowel,
the faces laid together, a couple of clamps were set, and the assembly was moved onto the
leveling scraps so that the mast was supported at least every 30 inches. The rest of
the clamps were set and we let the glue dry. Don't forget to put wax paper between
the scraps and the mast assembly. |
|
 |
8. Here is the eight-siding
jig. This one is made from 4 layers of ¼ ply. The critical dimensions are the distances
between the pencils and legs. The ratio of the distances should be: 0.7 / 1.0 / 0.7. I
found that it works best if you drag it back and forth slowly while holding the legs of
the jig against the spar - one pencil marks in one direction (forward pencil), and the
other pencil marks in the other. |
| 9. My mast is 2.5" in diameter from 16" from the foot to 5 ft. from the
foot. I made a circular mast gauge from a piece of scrap and a 2.5" hole saw so
that I could drag it along the mast and find the high spots and make a very nearly
cylindrical section. You can see a neat half-round sanding block (cylinder?) made from a
scrap 3" schedule 40 DWV pipe. A piece of a coarse sanding belt is held inside with
double-sided tape. |
|
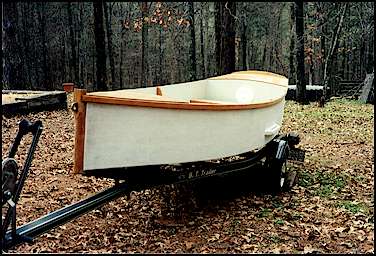 |
10. ShoeString
is in the February daylight for a photo opportunity with two coats of Kilz latex primer. |
11. To pull
up on shore, the kick-up rudder is a necessity. |
 |
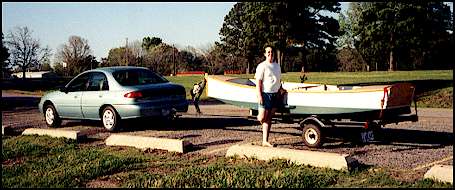 |
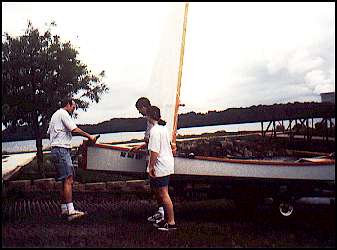
12. The small trailer and
light weight make an easy package for the road. If the weather looks favorable when
I come home from work, my daughter Mary and I do a quick hookup and 3 mile trek to the
lake. Once at the lake, ShoeString can be off the trailer and sailing in less than
15 minutes. How many other little wooden boats get their own Escort wherever they
go?! |
| 13. Launch Day on Lake
Dardanelle (impoundment on the Arkansas River). Notice the strengthening member on
frame #2 under the center thwart. |
 |
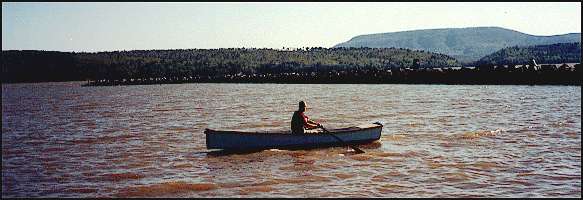 |
14. Rowing on Lake Dardanelle,
Mount Nebo in the background. She is an easy and able row boat. |
| 15. On launch day we doused
the bow in champagne and took a few swigs ourselves. "Honey, are you still
going to take the kids out after having the champagne? You know you haven't been
sailing since you were a kid." |
|
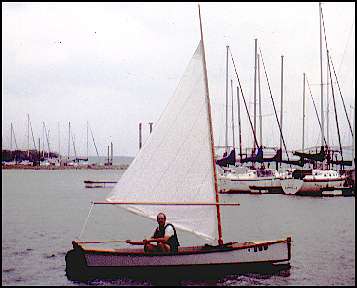 |
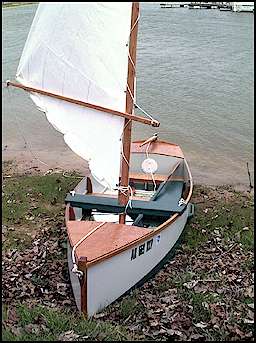
16. Here ShoeString is reefed at Lake
Texoma, Oklahoma. There is no halyard so the sail is reefed before the mast is
stepped. It is questionable whether reefing a sail on a this size boat is worth the
effort. On days that are so windy that you need a reef, the waves are so large they
stop the boat dead as you come about and it is hardly safe to go out. On this very
windy day we could only sail inside the yacht harbor breakwater. If one were to make
a sail without reef points (as the plan shows), there would be few days that you would
miss because the wind was too strong - you generally wouldn't go out for waves. |
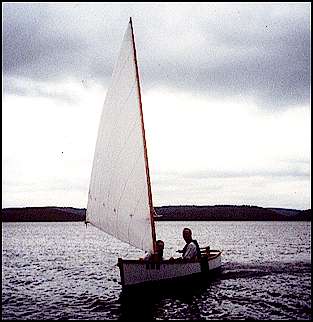
Mary and me on an afternoon
sail despite a cloudy sky.
Phil Lea
Russellville, Arkansas
phillip_lea@yahoo.com
|
|
|
