|
I am writing this account about my San Francisco Pelican 12,
Trixie B. I’ve wanted my own boat for as long as I can remember.
As a child, I was always standing on the shore wishing I could
be in any of the boats that I could see at the time. Now in my
upper-forties, it was time to act on this wish. I settled on the
Pelican because it was about the right size for a starter boat.
It had other characteristics that I like; built for rougher water
and so perhaps a bit forgiving, beachable, a large dry cockpit,
made of wood, and a salty appearance. My neighbor happened to
have one that was available at a fair price, too. It has turned
out to be a good choice for us.
William Short, a retired San Francisco Bay tugboat captain who
wanted something more than his El Toro to take out in the Bay,
designed the Pelican in the early 1950’s. He actually designed
a family of boats, 12', 16', and 18' respectively. The Pelican
is not a fast boat. It is quite seaworthy; Pelicans were designed
for sailing during the summer months on San Francisco Bay. Afternoon
winds reach 20 to 30 knots or more on a daily basis there, and
combined with strong tidal currents the conditions can be challenging.
We've never gotten wet in this boat, but we've never been out
in real serious waves, either. The Santa Rosa Sailing Club president
remarked to me that the Pelicaners always seem to stay dry on
Tomales Bay.
The Pelican's pram-type hull form has been described as having
a Chinese Sampan bow combined with a Banks Dory flared hull. It
is 12' long and 6' 2" wide at the rails. The mainsail is
a standing lug and there is a small jib on a removable bowsprit.
The boat weighs about 400 pounds on the trailer. It is constructed
on a building jig from 3/8" plywood with internal framing.
The combination of large flare, decking all around and high cockpit
coamings make for a dry boat.
I acquired a fixer-upper example of this versatile craft early
this year as my first boat. My family and I are really enjoying
it. Mine is a 12 that was first registered with California DMV
in 1966 and had been neglected for the last 5 to 10 years. We’ve
named her “Trixie B” (Trixie the Boat) after my daughter’s
mixed American Staffordshire and Australian Cattle Dog Trixie.
I guess Trixie the Dog could be called “Trixie D”
now.
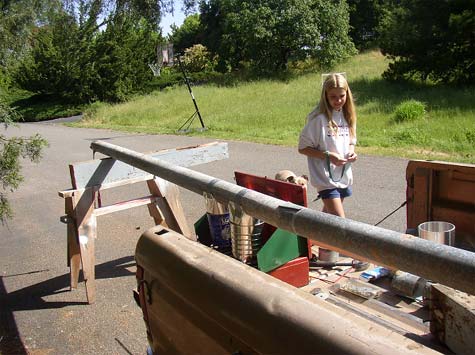
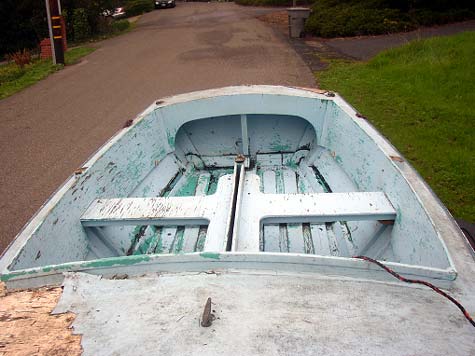
Here is what she looked like when I brought her home on Valentine’s
Day of 2004. She looked pretty good to me. The previous owner,
a neighbor of mine, had acquired the boat a few years earlier
from another neighbor who had stored the boat outdoors under a
deteriorating polytarp that let the boat collect water and leaves.
After attempting some rudimentary repairs, he decided to fiberglass
the hull when it still wouldn’t hold water. He used polyester
resin, so I hope it will hold up. Only time will tell. I guess
if the outer glass peels off, I’ll replace it. At least
the trailer appeared to be in pretty good shape. It only needed
a new axle due to extensive rust issues inside the bearings. The
garbage cans are there to keep the latest tarp covering from filling
with water and sagging into the cockpit. That worked pretty well,
the cockpit was in fairly good shape other than the peeling paint
everywhere.
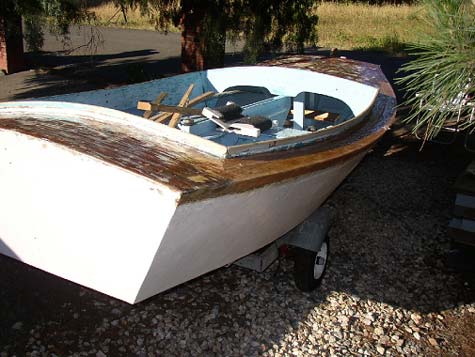
The deck was originally canvassed and coated with paint. The
canvas was peeling and coming unfastened in several areas. The
deck had rotted along the starboard rubrail just forward of the
cockpit. I figured a weekend or two and I’d have this little
problem patched and back in order. Another couple weekends of
sanding and painting and we’d be on the water within 2 months.
As a conservative goal, I determined we’d be sailing on
or before Memorial Day weekend, which was a little more than 3
months away. That goal turned out to not be so conservative.
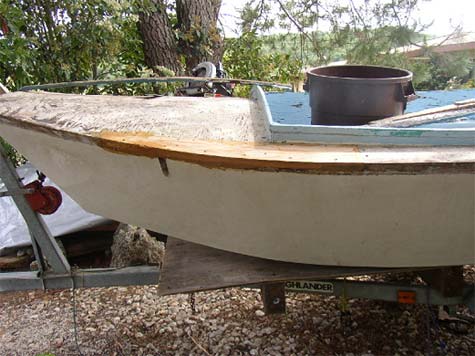
This is what that little weekend patch job looked
like after I finally uncovered the full extent of the afflicted
wood. So much for fixing it in a weekend! The port side had similar
damage to the extent that I expected the starboard side to have.
So, I cut out all the damaged wood that was reasonable to cut
out. There was some marginal frame material that would have required
major surgery to replace. Epoxy to the rescue! Learning to work
with epoxy was a bit challenging, but not too big a deal. The
pumps were quite handy, but required some learning as well. The
original deck beams are laminated with resorcinol just as called
for in the plans. Straight Raka epoxy soaked in like the wood
was a sponge. I also used a product called “Git Rot”
that is marketed for rot repair in some of the more localized
areas. It is very thin when mixed, and is quickly absorbed by
gaps in the wood. Drilling holes in the afflicted wood improves
the penetration. Working in dry 80°+ weather helped with absorption
also. It eased my mind that this boat seems to be over built.
Everywhere you look there are 1 1/2” thick knees or plywood
gussets to add strength to the structure. Mr. Short was not taking
chances. For example, the coaming extends about 12” down
inside the cockpit, for no obvious reason but to add stiffness
to the hull structure. All the frame pieces are at least 1”
thick. This boat was all built with bronze ring nails and screws,
too.
Here is a view of the old inwale at about amidships,
several feet aft of the more visible external deck problems.

Gwen and Trixie seem to be wondering, “What
is Dad doing now?”
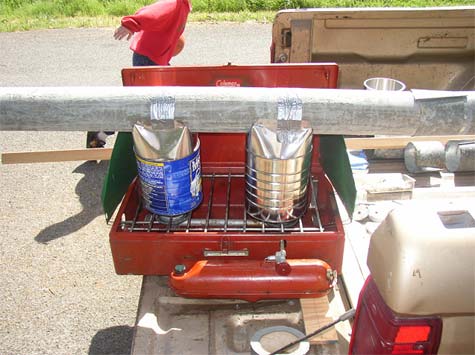
This shot shows the steaming contraption I built
from old house air ducting, two coffee cans, a Coleman stove,
duct tape, flashing stock and pop rivets. As Star Trek’s
Spock once said, “Crude, but effective.” The aroma
of steaming Douglas fir is actually rather pleasant.
I made a new inwale from kiln dried Douglas fir.
I steamed it in the steaming contraption. Here is the inwale clamped
to the outside of the hull to bend it to shape. It probably would
have made the curve without steaming, but I didn’t want
the boat to change shape due to the bending force of the inwale.
After it cooled and dried for a day, it easily slipped into its
proper place inside the hull. I also made a 3/8” thick piece
to replace the upper edge of the plywood where it had to be removed.
I precoated all bonded surfaces with straight epoxy to improve
the bond strength to the wood. All this was fixed into place with
stainless steel deck screws and thickened epoxy while the precoated
wood was still wet.
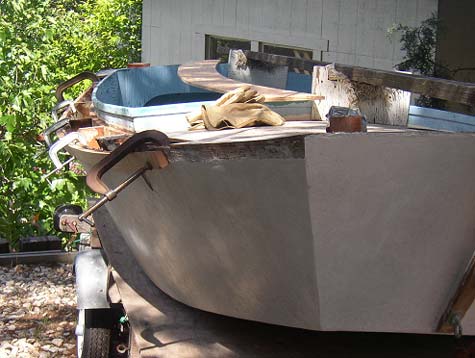
Here’s the port side repair. Wish I’d
thought to clean things up a bit for photos!
The centerboard was not installed when I got this
boat. The trunk interior had one or two dozen resin runs left
in there by the previous owner (a little “bonus” from
the fiberglass job) that would have prevented insertion of the
centerboard anyway had it not been for the closing down of the
middle of the trunk as you can see in this view. I wish I had
pictures of it, but this was actually solved very easily with
a roughly 3’ long piece of 1x4 and a 36 grit sanding belt.
I cut the sanding belt at the seam, stapled it lengthwise around
the end of the 1x4 and proceeded to grind out the trunk interior
with my homemade oscillating grinder. Definitely wear your gloves
for this type of work; the blisters on my hands formed quickly
and they were painful! It took less than an hour altogether to
widen the trunk to the point that the centerboard could be installed.
Grinding that trunk out was tiring! How does one get paint inside
there? Buy a paint pad refill and attach it to a thin piece of
wood with duct tape. Slather the paint on good and apply several
coats. I painted inside the trunk ends with a foam paintbrush
fastened to a stick with duct tape. Since it’s all down
in a narrow hole, it doesn’t have to be pretty. Who says
duct tape is only good for nearly permanent stopgap repairs? It’s
good for making stopgap tools, too.
I finished the outer upper hull with epoxy after
hitting it with a disk grinder to remove remaining polyester drips,
bedding compound, and to smooth things out in general. The deck
was coated with 4-oz fiberglass cloth and epoxy after a lot of
orbital sander work. Being my first fiberglass work ever, I had
to repeat the mantra “Work boat finish - Work boat finish”
numerous times. After all, the goal was to go sailing! The deck
glass overlaps the previous owner’s fiberglass work a couple
of inches to help increase my faith in his work.
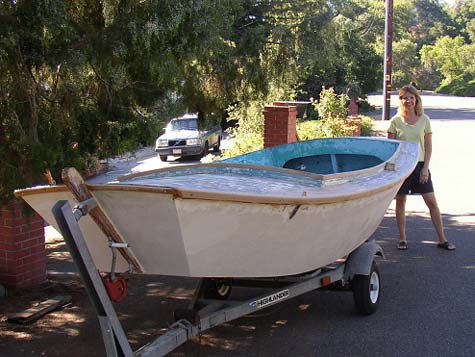
I made rubrails from 7-foot long white oak boards
ripped to size and then scarfed to length. The scarfs tried to
come apart, so they received some additional screw reinforcement.
Everything was overcoated with epoxy. That’s my lovely wife
Karen improving the scene.
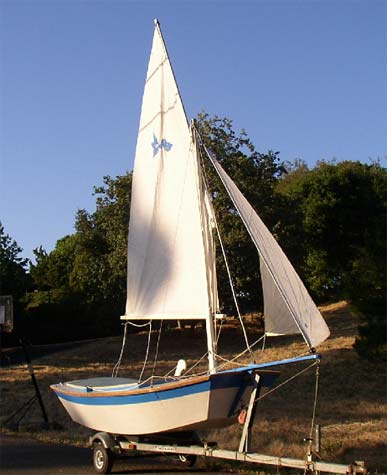
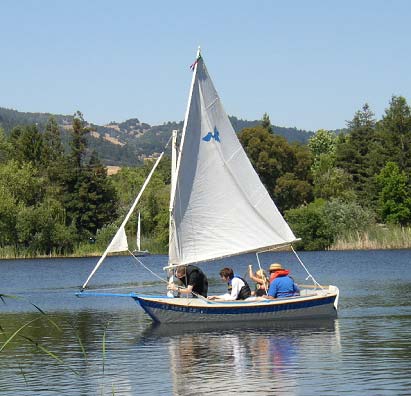
Here’s Trixie B on the trailer after painting
the day before Father’s Day. My revised goal was to sail
her on Father’s Day, so some of the finish work did not
get done. And since I value sailing time over repair time, it’s
still not done! I chose the color to match the pelican symbol
on the sail. The blue hull stripe is exterior latex over primer.
It’s held up for the whole summer with no signs of deterioration.
The deck was latex primered and painted with beige latex porch
paint. In addition to the hull repairs, she got a rebuilt bowsprit.
I “wipped up” a tiller the evening before, that is
rapidly climbing the list of things to fix. It now sports a pvc
pipe extension. The remaining rig is as I acquired it. I’ve
replaced the halyards and the sail lacings, and rerouted the mainsheet
since this picture was taken. The vertical wrinkle in the mainsail
has been reduced, but it continues to plague me to this day. A
nice bonus was the Harkin jib roller-furler.
On Father's Day of 2004, my 4 kids and I "broke
'er in" on Spring Lake. There is enough room for us all on
board, at least for a while. I've sailed my Pelican with 2 Dads,
2 12-year-olds and 2 70-pound dogs with no trouble. Trixie even
tried to save her tennis ball from the lake, and we didn't take
on any water. Having Trixie aboard makes sailing more interesting.
She was sure that the marker buoy was attacking us during a race
as it approached us (I suppose that’s what she was thinking).
Gwen lifted the marker up to show it to her and Trixie must have
thought it had tried to jump into the boat. Trixie’s barking
at the marker had the whole race fleet laughing in the bottoms
of their boats.
So far, I’ve mainly sailed in the small local
lakes. I’ve made improvements to the rig to simplify tacking,
but more can be done. The jib sheet routing could definitely be
better, as well as the seating. We’ve been out into Bodega
Bay a couple times, and stayed dry. The swell has been gentle
and wind waves of only a couple feet both times. Wind was about
10 knots. A slight trickle of water came down the mast after splashing
onto the deck, and the centerboard trunk spits once in a while.
A 1956 Evinrude Lightwin 3 (with original patina, my preference)
provides quite adequate auxiliary power. Just like anything new,
managing the ‘rude took some learning. It helps to look
at the motor and see which direction it is pointing once in a
while.
Finding Pelicans is pretty easy on the Pacific Coast. “Fleet
1” is an active Pelican fleet in the San Francisco Bay area
with races held nearly every month at various locations around
the area. Fleet 3 is active around the Puget Sound area. A fleet
of cutter-rigged Pelicans is rumored to have existed in New York,
but it may no longer be active. There are Pelicans scattered around
the rest of the United States, also. Huffaker’s Boatworks
in Washington offers new Pelicans built to order in just about
any state of completion. Owen Huffaker took over the Smith’s
Brother’s Pelican production fairly recently.
The Santa Rosa Sailing Club holds a sail-in-only campout / regatta
on Tomales Bay every Labor Day weekend up here in Northern California.
About a dozen Pelicans always show up for this event. Club members
tell me they are amazed at how much gear the Pelicaners can haul
into the campsite. It all has to come by boat; there is no vehicle
access. Fleet 1 goes to the annual Whiskeytown Reservoir regatta
also. There is a significant number of Pelicans cruising around
the Puget Sound area. They load their camping gear aboard and
stay on shore at any one of the numerous islands up there. A few
people have added “Pelican Boxes” and removable decking
to facilitate on board sleeping with a boom tent. I think the
16 or 18-footer may be more suitable for on board cruising, but
with the right mindset anything can be fun.
An on-line search for "San Francisco Pelican" will
turn up lots of Pelican information. Plans and sail numbers are
still available from the designer’s family. The Yahoo pelican-sail
forum contains several old magazine articles and photos in their
files and photos collections. There are a few on-line build diaries
also. The San Francisco National Maritime Museum has had teenagers
build several examples that can be seen and sailed there at times,
too.
This boat will never be a gold-plated trophy, but I’m pretty
proud of it.
-Jerry Church
SF Pelican 12 “Trixie B”

Some Links:
Pelican
Sailboats website
Pelican-Sail
Yahoo Group
Santa
Rosa Sailing Club
|