“Ask Capt. Ron”
‘Chines and Plans’
‘Chine Work’
From: David
Subject: Re: Re: Tabs, slots and castellations
 I do what I read in Devlin’s book. I just bevel off a tiny flat one the edge with a sanding block (lightly) at a 45 degree angle and it helps the two pieces Stay at the right attitude through friction. I first tie a few wires in loosely, get the things to sit on the bevel and then twist them all tight.
SNIP -
David
- - - -
Dave,
I can't take credit for this; I read it somewhere.
Drill the holes for the wires in the normal manner and insert the wires {I prefer plastic 'ties'}and give one or two twists. Just enough so they don't fall out. As a 'section' is done {or as each one is done} insert a piece of dowel - 3/8th for 1/4 ply, etc.- into the loop ON THE INSIDE of the seam and tighten the wire.
Do your filleting by whatever method you are comfortable with. Remove the dowels and finish the task.
Confusing? Maybe the explanation, but doing it is so simple. Make a small 'sample' seam or drop me a line and I'll try to explain further.
Regards,
Ron Magen
Backyard Boatshop
- - - - - -
From: "gmatkin@
Not at all [confusing], and I'm sure it can work well - though presumably you have find some way to prevent the dowel becoming stuck to the joint for all time.
It does however tie you to taping the outside first, which some of us like, and some of us do not.
Gavin
- - - -
From: "gmatkin@
I've never noticed them being called this in a shop, but Screwfix has them - and they are very close indeed to the screws we use for cheap furniture. The square drive type is often used in flat-pack furniture round here, the best of which seems to come from Sweden.
- - - -
Gav,
{re: Joints & Dowels}
Not necessarily the outside first.
Once everything is lined up to your satisfaction it's decision time. 'Outside' taping first - go to it. 'Inside' taping first . . . another step involved {THAT's why I said, ". . . what ever method . . ."}.
If you prefer the 'inside first' method, it's a simple manner of making connecting 'tabs' between the dowels. Depending on how much strain/tension you're working with they can be anything from a 'splash' of Hot-Melt adhesive to an epoxy fillet. Even the most extreme will only add a 24-hour 'curing period' to your construction time. Depending on your schedule, that time could be used to cut/mill/manufacture other parts or sub-assemblies.
{re: 'Sheetrock', or 'Drywall' screws}
Most of the 'flat-pack' stuff I've seen is a 'plastic' veneer over the visible side of the sawdust & glue material that passes for the 'Real Wood Look' these days. Heavy stuff, but no structure for screw holding. The deep 'gullet' of these type of screws gave a bit more hold then the 'traditional' screw, but not by much. I think the 'sockets' in the heads are more likely a 'hex' so an {usually included} Allen Wrench can be used for 'instant assembly'.
The threads on 'Sheetrock/Drywall' screws are usually a fine. The Deck Screws are typically the coarser ones. Also, because they are for OUTDOOR decks, they tend to be more 'rust proof' . . . some are even GUARANTEED so. I've used a number of these for raised beds and other garden 'accouterments's' for Joanne and the 'pups'. . . and they DO live up to their statements.
Having said that, when it comes to what I feel is a 'Critical Application' {such as her Rose Arbor made of CEDAR} I use the Stainless Steel square drive's from McFeeley's. They also have a very specific series of Silicon Bronze 'Boatbuilder's Screws'.
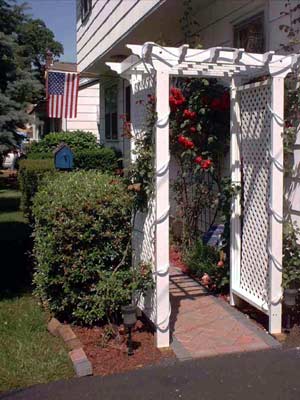
Joanne's Rose Arbor
Where I use most of my Deck Screws is as 'INSTANT CLAMPS'. A touch of wax and they drive with ease, plus no chance of anything sticking. In addition, it is RECOMMENDED that you use STANDARD 'straight' drill bits for pilot holes rather than the special Tapered ones for wood screws.
Regards,
Ron Magen
Backyard Boatshop
- - - - - - -
‘Scaling up plans?’
"S Burton" wrote
Hello,
Lets say that I've found a plan that I like, but want to scale it up a little longer - say from 14 to 18
feet. For argument, lets say it was a stitch and glue sharpie.
How exactly do you do this, and is it wise? By simply adding extra length, will I compromise the
design? I don't really want extra beam.
I have one Bateau under my belt, a relative novice.
Any thoughts?
Steve
- - - - - - - -
Steve,
"Typically" *all* small boat designs can take a little more OAL without increasing beam. In this case
your talking approximate 30% so I would consider that 'pushing the envelope' a bit. [to simplify; the
LONGER and NARROWER you go, the more you approach being a SINGLE Water Ski] Therefore,
proceed carefully . . . make & test models or go to an Intermediate Size.
If you go to 16 feet {from 14 feet} the process is fairly straight forward. Rather than just add a 2-foot
section to the middle, you add a little bit TO EACH section. Divide the 24 inches by the number of
Stations in the Plan, and add that many inches to each. This way you keep the proportions 'fair'.
Just remember everything is a 'trade-off'. In this case you'll be trading a bit of stability and stiffness
for extra waterline and hull speed.
Regards,
Ron Magen
Backyard Boatshop
- - - - -
From: "S Burton"
To: <quohog@worldnet.att.net>
Ron,
Thanks for the speedy reply.
I guess what I'm really looking for is another design that is correct right off the plans.
Can you by chance recommend a sharpie design of about 18 foot in length with a narrow beam? I am used to sailing canoes, so the handling shouldn't be much of a shock. Ideally I'd LIKE a beam of about 40" or so, but this may be unrealistic. I'd stick with the canoes, but I'd like something with a centreboard, and at least half decked.
Where I like to sail, the conditions are shoal draft and narrow little passageways (here called "fishways") that pass through seawalls and such. So a 4'6" beam as I have seen on many designs of
the size that I'm looking for is just not good enough - I'd never be able to squeeze through!
Any ideas? thanks,
Steve
- - - - -
Steve,
A 'recommendation' would depend on many factors. However, to condense it to THREE;