|
River Runner - Stitch & Glue - Part
1 |

|
|
By Chuck Leinweber - Harper, Texas USA |
We got a chance to do a float trip on the San Juan
River with a group of friends. The course was more
than 50 miles of canyon which, once entered, must
be traveled to the end. This called for a river boat
that was stout and able to take rocks in stride. Most
of our group would be taking plastic canoes but we
thought Jim's tradtional River
Runner would be a good choice for a river
having a maximum of class III rapids. But to make
it strong and abrasion resistant, we taped the chines,
glassed the bottom and used a graphite/epoxy coating
on the bottom.
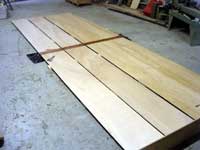
We wanted to boat to be
reasonably light for possible portages,
so 4mm Occume was used for the sides:
6mm Meranti for the bottom.
(click images for larger views)
|
|
|
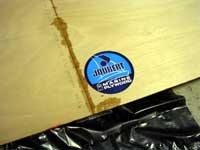 |
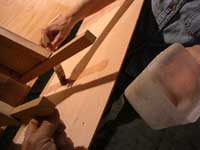
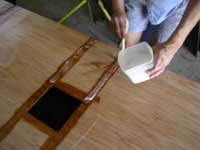
I had never used Occume
before and was impressed that each sheet
had a big sticker that had to be removed
before it could be used. Here, one side
has had a Payson joint (glass tape) applied
and I am about to glass the other side.
|
|
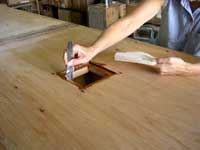
Once joined, the two sides
were clamped together, marked and cut
to the final shape.
|
|
|
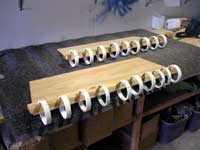 |
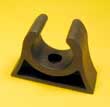
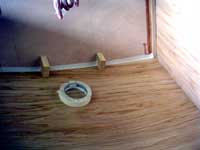
The plans are quite clear
about the measurements of the sides and
the bulkheads and transoms. So far, we
were following the plans closely. (PVC
pipe clamps) |
|
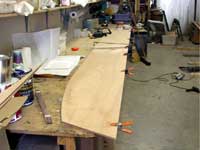
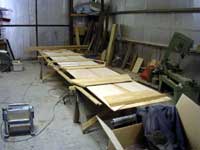
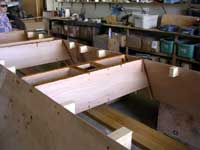
Here are most of the major
components laid out. The first diversion
from the plans involved building the
seats with two supports instead of one.
This allowed us to include more storage.
|
|
|
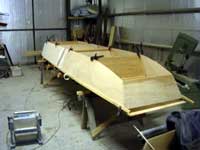 |
We temporarily screwed
the bulkheads and seat supports to the
sides. Gently (remember those sides are
just 4mm) we turned this assembly over
onto the bottom so that it was right side
up. |
|
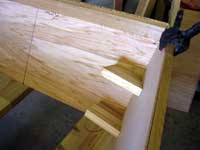
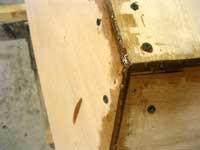
I cut blocks to the right
angle and used drywall screws to attach
them to the transoms to the sides. I
like to do this instead of wiring. To
me, it is faster and easier to adjust.
|
|
|
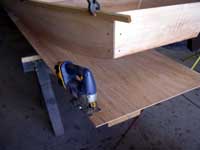 |
The bottom was pulled
up to the sides and spiled (marked) for
trimming. |
|
One clear departure from
the plans was the construction of a
'cooler' under the seat. Since we would
be a week away from civilization, I
needed a way to keep insulin cool. Diabetes
does not slow me down too much, but
I do have to make some adjustments.
|
|
|
 |
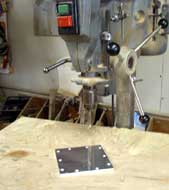
The idea was to build
a 6" x 6" chamber and line it
with foam except for the bottom where
the 1/4" ply would be replaced with
a piece of aluminum plate screwed to the
framework and glassed over. |
|
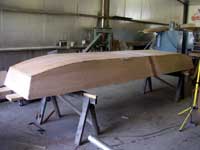
Cedar outwales were fitted
before any gluing to help the boat assume
the proper shape. Cedar is not the toughest
wood, but we were going for light here.
|
|
|
 |
Ready to begin gluing!
First, mating surfaces are coated with
regular epoxy, then thickened resin is
spread over one side of each joint and
the two sides are screwed back together. |
|
We turned the boat back
over and used blocks to temporarily
attach the bottom to the side/bulkhead
assembly.
|
|
|
 |
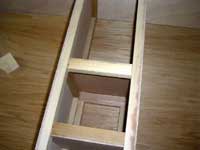
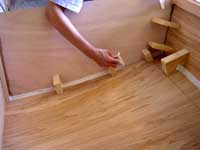
We next removed the bottom
to glue it to the bulkheads. You can see
the blocks and the framing for the 'cooler'. |
|
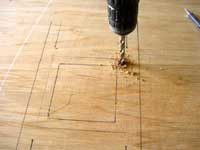
Before we removed the
bottom, we marked all the bulkhead locations
so we could cut out for the aluminum
heat sink and glue the bottom on.
|
|
|
 |
Once more we painted on
liquid resin and then applied thickened
epoxy and screwed the pieces back together.
We did not glue the blocks. |
|
It's always easier to
remove epoxy before it hardens so we
cleaned up the corners where the aluminum
plate would go later at this time.
|
|
|
 |
The next day, we carefully
masked the insides of all the joints that
would be taped later. I usually tape the
outside first contrary to what is usually
done. It seems easier to me. YMMV |
|
To use this assembly method,
you "weld" the outside together
by first painting the joint with liquid
epoxy then filling the crack with epoxy
thickened with wood flour. The first
coat of resin prevents the joint from
starving as wood soaks up epoxy.
|
|
|
 |
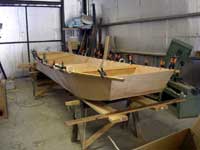
The "welding"
holds the boat together for the next step.
It starts with the removal of the masking
tape and the blocks. |
|
on to
part 2
|