| Constructing A
NACA 0012 Rudder and
NACA 0010 Daggerboard Foils
Part
2 - Fairing the Foils
Click
for Part 1 - Cutout and Assembly
Note: You can
leave the strip edges untouched if you want to.
After reviewing the posts from the last story and
rechecking the drawings at a higher zoom rate in
my design program; I can go either way on shaping
the strip edges or not. From the drawings, the outer
edges of the plywood strips do get a bit of shaping,
but so slight that it is not worth the effort. Just
make sure there are no rough edges that act as road
turtles or potholes when you apply the EZ-Fillet
material. A slight touch up on the strip edges can't
hurt. You can skip the next paragraph if you want
to.
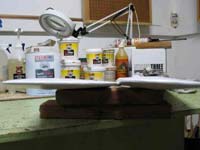
Block up the daggerboard blank with
scraps of 1/8” ply and use a longer sheet rock
screw to hold it to the 2x12 so it doesn't wobble
around. Use a plane or rasp to slightly bevel the
leading and trailing "long" edges of the
top strip (the 2” wide one) so it matches the
cross section view in the plans. Sand the bevels even
and smooth. Clean off all dust.
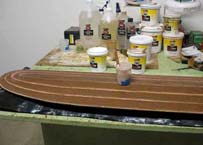
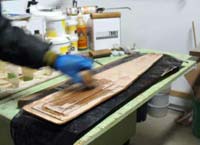
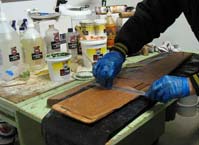
Coat all the surfaces of the foil you are working
on with epoxy, and especially the edges, and let the
epoxy soak in. This will fill up the porous edges
and surface of the plywood strips and keep from starving
the interface between the fillet material and the
plywood. Let it set a few minutes before you apply
the fillet material.
 |
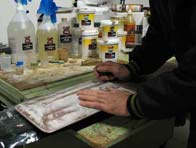
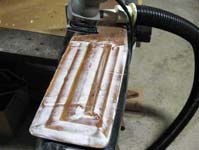
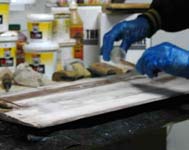
Mix up and bag some EZ-Fillet
material as you have seen me do in the
Laura Bay construction story; or just
scrape it out of the cup as you need it. Squeeze out
a bead along one of the "stair steps" and
use a small straight edge to fair the material into
the gap between the adjoining stair step edges. After
you have filled all the stair steps; take a longer
and more flexible straight edge and pull the full
width. Be careful on the curves. If the material
is pulling up, stop. Smooth out the fillet material
as best you can and let it cure. Limit creating
any high spots you may have to sand later($$). You
can come back after it has cured and fill any low
spots with more EZ-Fillet
or QuickFair.
Let the fillet material cure overnight.
 |
|
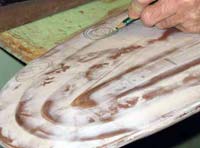
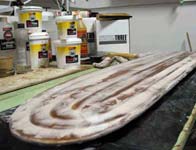
Rough sand with 60 grit to smooth down the surface
and find any high or low spots. Wear A Dust
Mask any time you are sanding epoxy! Sand
down the high spots to bring them back to the designed
outlines. If you did a good job with the fillet material,
there should not be too many low spots to fill after
the first sanding. I haven't done the perfect fillet
job on a NACA foil yet, so I always have some craters,
holes, and streaks to come back and fill. Clean off
any dust that may have collected in the depressions
and make sure you give the “holes” a bit
of a roughing up too.
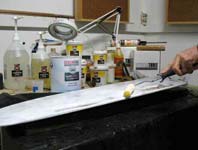
Now is the time to break out the QuickFair
to fill in the voids on your sanded surface. Don't
mix up too much at a time. Stick with 1-½ oz
mixes [1oz part A (tan) and ½ oz part B (white)]
for fairing the surface. If you did a reasonably good
job with the fillet material, it won't take that much
QuickFair
to fill in the holes and you will be surprised at
how far it goes. You may want to take your time here
fairing out the surfaces of the daggerboard and rudder
by doing it in a couple of applications with a good
sanding between fully cured coats.
Now run your hand over the sanded surface to locate
any major depressions and lightly mark their locations
with a colored pencil. If you change the color of
the pencil between each fairing compound application,
you have a better idea of which spots really need
to be filled this time.
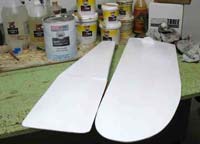
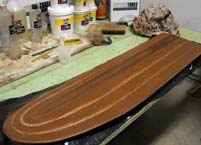
Give your finial fairing coat a good sanding and
remove all traces of dust with a damp cloth. Once
again give the foils a good rubbing with your hand
to detect any high or low spots. If it feels good
to you now, call it quits. No use wasting anymore
time and materials to make it Olympics class perfect.
Anyway, it's now a lot more efficient than a plan
old board shoved down the daggerboard trunk.
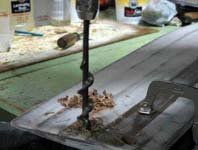
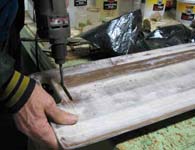
For the daggerboard, we still need to mark and cut
out, the "lifting hand hole" and “stop
ring”. The stop ring is a ¼” piece
of plywood scrap cut and smoothed to a 3” diameter.
The hand hole can be sized to fit your hand and is
placed in the thickest part of the foil cross section.
Give yourself at least 3/4” of wood to grab.
Use a 1" drill to make the end cuts and a keyhole/jigsaw
to open up the center. Round and smooth all edges.
The stop ring is placed 1/2” below the bottom
of the hand hole and is centered at the “balance
point” of the daggerboard. I use the ring as
the “stop” to keep the daggerboard from
dropping through the trunk slot, and as a pivot point
for the daggerboard to rotate on as it gibes in the
trunk on different tacks.
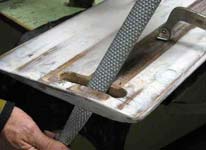
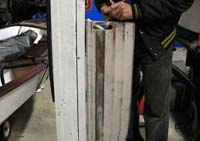
You can find the balance point by cutting out the
hand hole first and then holding the daggerboard with
one finger in the opening. Move the daggerboard along
your finger until it remains vertical. Hold it close
to something you know is vertical to use as a reference;
as I am doing in the photo. Mark that point as the
centerline of the stop ring.
Drill the holes for the ¼" x 3"
stop ring and use the keyhole/jigsaw to remove the
wood between them. Clean up the edges until the stop
ring fits and epoxy the finished and centered ring
in place.
Give both foils a finial touch up with 150 grit,
remove any dust from the surface with a damp cloth,
and apply at least two individually cured coats of
epoxy to the daggerboard. Make sure to coat the interior
of the handle and the edges of the stop ring. Whether
or not you fiberglass the daggerboard and rudder is
up to you. The coats of paint, epoxy, fairing compound,
and fillet material, are plenty tough enough by themselves.
After the epoxy has cured, give the foils another
go over with the 150 grit before you apply 2-3 applications
of a high quality marine enamel paint. Let everything
cure for a couple of weeks before you put it to use;
that way the paint has plenty of time to cure and
achieve it's full hardness.
The daggerboard is finished, but the rudder still
needs hardware added before it can be attached to
the boat. Mounting the rudder is something I covered
in the Laura
Bay series of stories.
The NACA0000 foils we have just made will make a
big difference in the performance of your boat. When
I'm cruising along in the Laura
Bay pointing high, and I push the daggerboard
from ¾ down to full down; the boat heads up
several degrees as soon as I do it. If you don't want
a gibing daggerboard, you only need to shape the amount
of foil that sticks out the bottom of the boat. Just
measure down from the top of the foil the depth of
your daggerboard trunk and adjust the outer layers
to full fore and aft width for that distance. Everything
else is the same. If your foils need to be longer,
just add the extra inches to the top of the measurements.
You can only lengthen the foils, you cannot make them
wider or thinner/thicker and still be correct for
that 0000 series number.
I will be adding a third story to this series to
explain how I use my design program with the NACA4gen
numbers generator to make foils that suit the needs
for the boat you are building or dreaming of.
Thanks again for reading my stories and I hope this
makes building and sailing your boat more enjoyable.
Warren
Messer
Red Barn Boats

Other Articles by Warren Messer
|