| A Micro-Shanty
Style Houseboat as built by Bill Nolen
Part
1 - Part
2 - Part 3 - Part
4 - Part
5 - Part
6 - Part 7
Let's see…where were we when Part
Two ended? Ah yes, the attachment of
the bow chine logs. After I installed the second bow
chine log, I then attached two 1-inch by 2-inch boards
to the aft end of the boat by cutting a 45-degree
angle in the aft end of the bow chine logs and mating
the two boards to this angle.
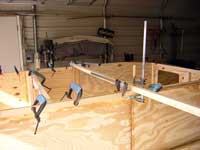 |
Photo showing
the chine log being glued on. |
While I was attaching the aft chine logs I noticed
that the slight bulge outward in the starboard side
hadn't disappeared…as I had hoped! So I rigged
up clamping jig using a pipe clamp and some 2-inch
by 2-inch stock. With a slight amount of pressure
the pipe clamp pulled the bulge inward. I added an
expoxied board on the inside of the side to hold the
side in alignment.
 |
Photo showing
the chine log clamps |
After all the epoxy had cured for a day or so, I
decided it was time to place the boat hull onto the
dolly. I didn't want to wait any longer because the
hull was getting heavier with each addition that was
made to it.
While I lifted the aft end of the boat, my dear wife
Donna slid a small auto floor jack under the transom
bulkhead. I used the jack to lift the transom high
enough so that I could slide cement blocks under the
two corners of the transom. I then jacked up the front
of the boat by moving the jack under the second bulkhead.
There I also placed two cement blocks. By removing
one of the corner cement blocks at the transom I had
space to slide the dolly under the boat. I moved the
dolly around until the bulkheads were positioned over
the lengthwise boards of the dolly. I replaced the
floor jack under the transom and removed the single
cement block, lowering the hull onto the dolly. Moving
to the front of the boat, I removed the two cement
blocks and lowered bulkhead two onto the dolly.
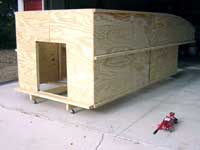 |
Photo showing
hull placed on moveable dolly. |
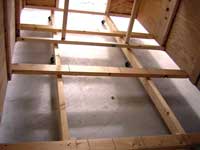 |
Photo showing
how the bulkheads rest on the lengthwise boards
of the dolly. |
The Harmonica plans call for two 2-inch by 6-inch
bottom stiffener board to be installed between bulkhead's
two and three. These boards also provide the platform
to which the seats/bunks rest. I installed these boards
as outlined in the plans, although later I plan on
extending the bunks into the storage area of the bow
to provide more useable space.
 |
Photo of the
2-inch by 6-inch bottom stiffeners just installed
but not yet sanded smooth. |
Since the bottom sheets of 3/8-inch plywood are joined
together with butt joints, reinforced with 1-inch
by 4-inch cross boards, it is necessary that slots
are cut out of the bottom stiffeners so that the cross
boards can lay flat.
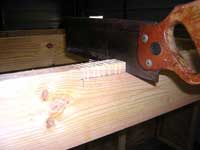 |
Here I have
started cutting the slots for the cross boards. |
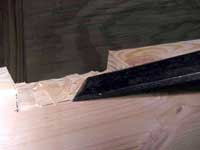 |
Using a chisel
to cut slot for first butt joint. |
I decided to epoxy the three butt joint/cross boards
onto the hull and not try to assemble the bottom plywood
into one 13-foot sheet. That way each bottom plywood
sheet would only be four feet long and much easier
controlled.
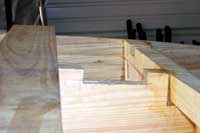 |
Photo showing
one of the butt joint boards ready to be expoxied
into the cut slots. |
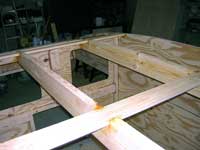 |
Photo showing
all butt joint boards installed. |
Because I had left an extra amount of material on
each bottom plywood panel, making the panels over
five feet wide, it was necessary that the panels be
cut to fit. In the photo below you can see where I
marked the bow panel and was all set to use a skill
saw to trim the panels. However, I remembered that
I had a router bit designed to cut plywood so I decided
to try using the router. Holding the panel in place
with clamps it was quite easy to cut the excess material
off each side of the panel for a perfect fit! I could
have cut off the excess material after epoxing the
panels in place, but I was concerned that the cured
epoxy would dull the router bit.
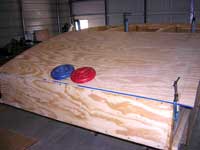 |
Photo showing
bow bottom plywood being measured for fit. |
I had been worrying that the bottom 3/8-inch plywood
panels wouldn't want to curve over the bow without
being treated with hot water. However, with the front
edge of the plywood clamped and nailed into place,
the aft end of the panel was actually easy to pull
down and clamp into place. The cross boards aided
greatly in the clamping process.
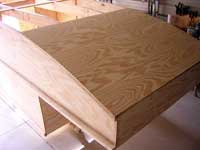 |
Here the bow
bottom panel has been installed and the epoxy
has cured. |
When I mixed the epoxy resin for the bottom panels
I used a mixture of wood flour and West Systems 404
Adhesive Filler until the epoxy mixture was somewhat
like thin peanut butter.
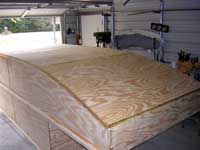 |
Photo showing
all bottom plywood panels installed and clamps
removed. |
My next step was to install fiberglass tape and epoxy
resin on the hull's seams.
I had ordered a 4-inch wide and 50-foot roll of fiberglass
tape, so I cut the first piece long enough to fit
the bow seam.
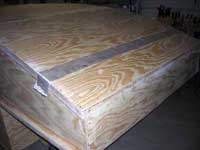 |
Photo showing
bow tape ready for epoxy to be applied. |
Using unthicken epoxy, and a 2-inch paintbrush, I
applied a thin coating of epoxy to the wood. laid
the tape onto the epoxy and applied a second coat
of epoxy onto the top of the tape filling in the cloth's
weave the best I could.
As the bow fiberglass tape cured, I applied fiberglass
tape to all the butt joints that joined the bottom
plywood together, then on all the bottom/side seams.
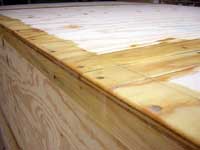 |
Photo showing
the cured fiberglassed butt joints and side
seams. |
After the fiberglass tape had cured for about 24-hours
I applied two coats of thin epoxy to the bottom plywood.
I allowed the first epoxy to almost cure before adding
the second coat.
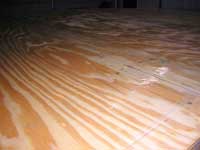 |
Photo showing
the cured epoxy coating on the bottom plywood. |
On
to Part 4 |