Well, yes, it’s a beautiful design. I need
it to do this, but it’s designed to do that.
Oh, well I can just modify it to suit myself, right?
We have all fallen into that trap (haven’t
“we”? Oh great, am I alone again?), second
guessing seasoned designers and their collective talent.
I fell deeply into this thinking I could easily, and
without difficulty, make a fixed seat rowboat into
a slider. Why not, right? It’s a simple conversion,
just a little wood here, some fasteners there, sure
that oughta hold. CRACK!
 |
Thames Rowing
Skiff, Selway-Fisher. Want to know more about
her? Article coming soon!
click images
to enlarge |
My wife wanted a sliding seat rowboat to change
up her workout routine. How can I say no to a beautiful
woman wanting to keep herself in shape? I designed
what I thought to be an effective sliding seat setup
by stealing some items from a Glen-L set of plans,
some measurements out of shells I had rowed, and a
little shadetree squint-and-build. While they actually
are great sliding seats, I ran into a problem with
the scantlings. I had epoxied the vertical supports
to the 4mm ply thinking that it would only be subject
to compressive stresses while being rowed. Who can
argue with that logic! Hm, oh yeah, Mr. Murphy himself.
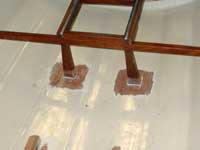 |
After sanding
the area, before damage |
I had neglected to remember “compression only”
when I built a small roller to lift the boat onto
the dock (which was damaged by ice and is now a full
18” above the water line). Hey, just pull this
up, tip it down into the cradle, I’m a genius!
CRACK!
What happened later was the vertical bracing, being
attached to the horizontal framing as well as the
main frames in the design, were very strong. Stronger
than the lamination glues in the BS1088, as a matter
of fact. Over several launchings and retrievals, I
managed to pull apart 2 small pieces of the ply right
at the uprights. Its not a major issue as it isn’t
structural, causes no rowing abnormalities, and they
only separate when the boat is being launched or retrieved
from the dock.
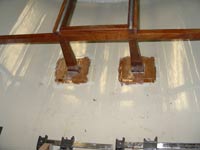 |
After repair
and first coat of epoxy/'glass |
Now this is a curiosity of mine. Why not just leave
it, it's not harming anything, just a little paint
and glue… Have many of you fallen into that
trap? Neglect it until it becomes a problem? Bah,
if it gets bad, I will worry about it then. I had
fallen too deep on that in another boat, so I pulled
the trigger on a repair. After seeing how easy it
is, I highly recommend just making the necessary repairs
over whatever time is needed.
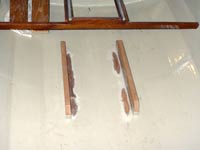 |
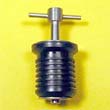
Foot stretcher
rails as sanded |
In the photos you will notice I sanded the paint
off to bare wood, added a small piece of fiberglass
to spread the load a bit more, and solidify the damaged
area. I also included a fair amount of epoxy to close
the wound and prevent decay. Hey, look I have the
sander in my hand, why not do that foot stretcher
lift she asked for? Off I went again, sanding more
paint, fabricating a set of blocks and new runners,
and mere moments later, we have lift! Well worth the
time.
 |
And being glued
up |
Without a doubt, just get it accomplished. I haven’t
actually finished the project (still needs paint,
as it took 2 days for the epoxy to dry in the balmy
39 degree F garage with a heater to assist), but just
wanted to inspire someone, anyone, to take that nagging
little error, correct it, and extend the life of your
project well beyond a minor area of rot turning into
a major project or a moderately sized bonfire.
Oh yes, as far as the boat? 17’
Thames Rowing Skiff, Selway-Fisher. Want
to know more about her? Article coming soon!
Eric Staggs
Spokane, Wa

|