Part 1 - One of Those
Part 2 - This Small Space
Part 3 - So Where's This Boat of Yours?
Part 4 - Planking Nightmares
Part 5 - It's All Downhill from Here
Part 6 - The Routine
I had a 15ft flying junior sailboat for a few years. It was a restoration job for sure. Barnacles covered the hull like something you see on a steel barge. But once cleaned up it was a nice little fast boat and with its’ swing up centerboard I had no worries about shoals. I remember cruising over a very shallow sandbar one day with my brother on board, and the next thing we knew there was a muddy rooster tail coming from the back of the boat. We were drawing about 4-5 inches of water and once over the shoal the board came down again. John Welsford's Pathfinder having a swing up centerboard opens up many locations to me that otherwise would require a swim in the 3 degree water of the North Atlantic or a tow along dingy to access the beach. For those not familiar with Newfoundland “beaches” please Google “TRUXTON sinking”. To rescue those American sailors from the beaches, locals had to use ropes to scale the cliffs to get down to them on that stormy night in the winter of 1942. It’s not all like that but much is. Again I digress.
 |
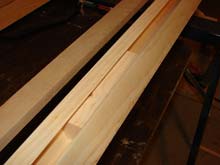
The centercase on my pathfinder was blocked up using the maple I had cut. That stuff is like steel once dry, and heavy.
click images to enlarge |
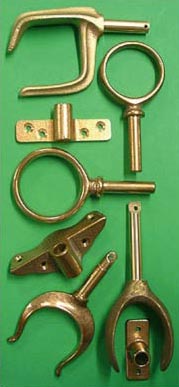
The pivot pint arrangement for the centerboard I changed a little and used bronze oarlock sockets for a bearing sleeve for my stainless steel pin. All kept inside the socket with a treaded end plug.
|
 |
 |
Personally I like this type of arrangement for a centerboard pin assembly. Simple, strong and relatively cheap. |
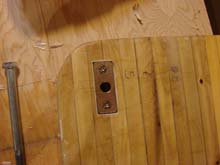
The rudder case also had its packers made from maple. The side parts were 3/4” plywood. All encased in epoxy once shaped glued and screwed together. |
 |
John's plans call for the mast, boom and gaff to be made mostly from aluminum tube with end bits of wood for mounting and reinforcement. This being a project where final looks were everything and a bit of extra time in making a mast was somehow not an issue. There’s some feeling of accomplishment when you tell someone you made your own mast. Chest puffed out “Yes I made that”. Great.. now I just have to learn how.
I read up on it, looked at pictures, and stumbled across a set of router bits at a hardware store to make those exotic cuts to make a “birds mouth”. A couple of practice runs and I was ready to attempt this. The biggest problem I encountered was handling the 12ft pieces running them through the router table. Scarfing these into longer 18ft+ pieces was no issue, though I planned the scarf’s spacing carefully. Not to have any scarf joint next to each other.
 |
Where rigging was bolted through any point, I glued a shaped block of wood on the inside at that area for reinforcement and not to allow water to enter the inside hollow sections. |
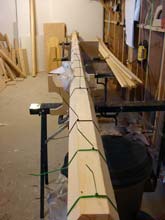
Once dry fitted and checked the assembly was marked and glued. Cheap rope and cable ties were used to clamp the assembly evenly and placed in a jig to make sure it set straight. Each part was done in this manner. I don’t know how many times I checked the length of the mast before gluing. A fear of building a perfectly straight mast that was too short hung over my head. These 3 items once dry were put aside for finishing some other time. I didn’t want to push my luck after a successful glue session. |
 |
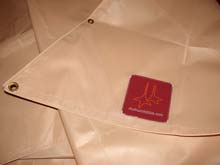 |
With the apparent success of the mast project I rewarded myself by ordering my sails from the fine folk at Duckworks. I went heavy on everything. From the cloth to the number of reef points. |
Friends and family have dropped by on occasion for a coffee and ask to see the boat project. I show them the downstairs workshop and the corner filled with strangely cut pieces of plywood and the loft showing long hexagon shaped pieces of lumber. “Oh” they say. I then show them the centerboard and rudder in the current unfinished state and they look at it like looking at a painting by a kid with obviously no talent. “That’s nice” or “cool” being typical responses. It’s similar to when you start a house and people come by to view the progress and you show them the basement and the pile or roof rafters. This sort of tour could get some people down about their project, but it’s only that they don’t quite grasp what has to be done first and with limited space, some things... many things have to be built while you have the space. I used to go out to see a movie with my buddies or watch a game on TV, but now that time is used for this project. Something has to give when you’re working on a project like this, and you can’t neglect your family too much, your buddies will understand, besides they know where you live if they want to visit.
As far as I know, all the small parts are complete as far as I dare without causing major headaches down the road. With that assumption, time to clean up the shop. I have a boat to build! It took an entire day of cleaning and stuffing things into other parts of my house but the shop is now big enough to hold a 17ft boat.
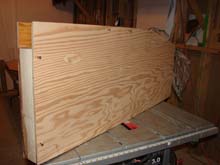
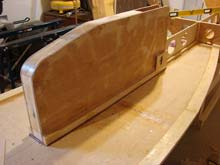
Without wasting any time I dragged in some plywood, measured and cut the floor/bottom panels. I scarfed the two pieces together and clamped it down with handy items including a bucket of left over lead weights. The panel was placed against the wall because it was going to be used very soon. |
 |
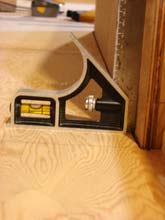 |
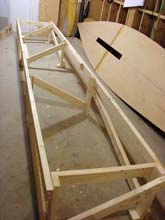
The building jig is important. John said so. I took this seriously and as the jig was built I made sure it was as perfectly level in both directions as I could get it. To make sure it didn’t accidently shift, I epoxied the jig to the concrete floor. I’ll figure out the taking apart issue later. |
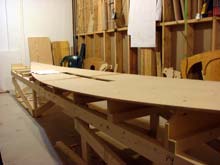
This sucker is big! I’m standing at the wall and it runs the full length, but it fits, barely. The lifts that make the curve of the Pathfinders bottom were carefully measured and screwed in place. The floor panel was then screwed down to this jig. (Note to self: remove hold down screws from jig before finishing floor panel) |
 |
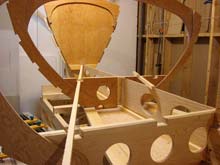 |
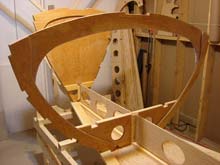
Now this is looking like something. Within a couple of days I had placed all the frames including the stem girder in place and glued them. They were checked before gluing for being level as was the stem for being perfectly vertical. |
I placed a couple of braces to lock the stems position. The centercase was and checked glued in place. With all those frames made earlier this part of the build goes really fast. |
 |
 |
Now I have the makings of a boat. Friends coming around now get to see “the boat”. Their eyes light up as do mine when they walk in and see the backbone and skeleton of a 17ft sailboat in my workshop. |
Now they see what the boat might look like some day. They now ask questions about how many could fit in her and how fast will she go. “Where’s the thing that holds the sail”? I point to the big stick suspended in the ceiling, “oooH very cool!” |
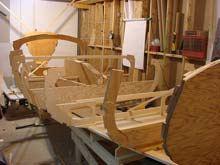 |
I have spent some considerable time sitting on a bucket in the cockpit of my Pathfinder skeleton nursing my coffee and drinking up the sun’s rays as I drift across the imaginary waves.. aaah, now this is sailing.
***** |