|
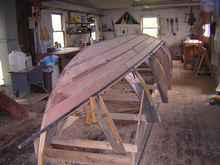
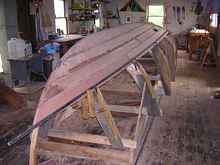
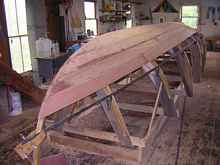
Planking the whaleboat
The whaleboat design I got from Mr. Beetle was adapted to build
in lapstrake epoxy. In this method the keel and the stems are
separated into two layers, the inner and the outer; and the rabbet
line is where they come together. Once the molds are set up and
the ribs attached, the keelson (the inner half of the keel) is
glued to the ribs and the inner stems (fore and aft). The molds,
marked with the planking widths at each station, show the edge
of the planks where they cross the ribs. Determining how the garboard
lands on the keelson (and the subsequent planks land on the ones
before) is the essence of this article. The photos refer to the
making of the 5th plank but all the others are similar.
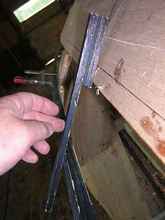
We begin with “the magic batten”
The magic batten knows all and tells all. It allows you to see
the run of the plank and determine its fairness, and it is a working
reference curve for each plank shape. Battens are made from clear
stock in various thickness; when they bend, they define “fair”.
Painting the battens black makes it easier to see the curve.
Even though we’ve already determined the planks widths,
I still set up the batten to consider each plank shape. First
though, use the batten to make a fair landing on the previous
plank, setting it in at 1' intervals along the length and making
sure it looks smooth; This is a chance to eliminate any unfairness
that crept in from the prior spilling or the scarfing.
 |
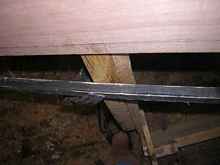
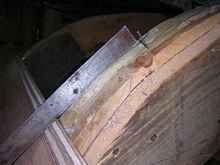
Lap line test |
You can perhaps see that the line bumps up slightly at station
4 where there was a scarf joint; when I remove the clamp at this
point the batten assumes a fairer curve : Magic!
 |
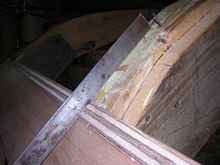
Lap line fair |
Fairing the landings
Using the planks width marks on your molds, place the batten
along these marks to see the run of the next plank; I like to
add the 1” overlap to this mark now so I don’t forget
it later.
| Plank line |
 |
Gaze at it thoughtfully for a while until you are sure you like
the way it looks. Recall that the ribs are laminated square in
cross section; the batten shows what needs to be cut away to make
the ribs parallel to the plank curve.
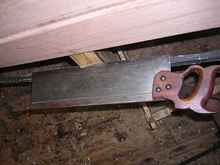
Using a saw lined up with the batten, cut down to the mold as
shown.
Do this for all the ribs and the stems, and remove the batten.
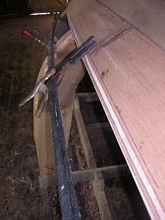
now cut down to the saw line using a slick.
Spoke shave, plane, adze, axe, etc. Replace the batten to see
if it lies fair along the full width of the rib and just makes
contact with the reference edge of the mold.
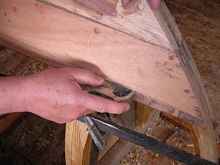
 |
Spoke shave |
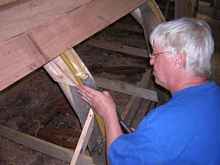
“Faired stern”, shows the batten landing on rib 9
and the aft stem.
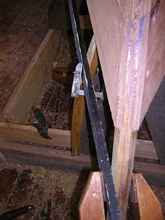
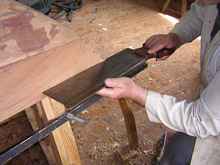
The rolling bevel
Re attach the batten at the plank reference lines on the molds
(remember to add the lap width). Make sure it lays flat against
the ribs and does not twist up. Make a bevel gauge using a flat
stick with a glued spacer the same thickness as your batten. As
you lay this gauge on the batten against the prior plank, it will
show you the angle of the rolling bevel.
I use the gauge every 18-24” and, starting in the center
of the boat, work my way to each end, taking a few passes at each
test spot with a block plane. Keep the blade sharp and keep moving,
working down to where the planed bevel reaches the line marking
the lap width. As you get closer, take lighter cuts and longer
strokes, and the plane sole will make sure the bevel surface transitions
smoothly. Plywood helps you visualize the transition with smooth
gradations of plys.
Now finally, make sure that the plank surface will span the
rib from the lap to the rib landing; some of the mid ship ribs
at the bilge need to be planed down to allow the plank to lie
flat from rib to lap.
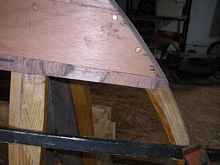
 |
Bilge rib before |
| Bilge rib after |
 |
(On this boat I had designed the widths so this didn’t
need to be done, but had designed it for 1/2” planking,
which I only use for the first three planks (see the transition
at the stem).
It didn’t matter until the turn of the bilge on this plank,
and I realized I had overlooked this half way through gluing the
plank on. Fortunately I was using slow epoxy and had time to take
it all down, plane the ribs, and glue it back: where the epoxy
was setting up I mixed in some fresh unthickened glue).
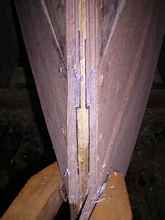
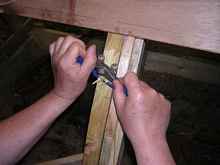
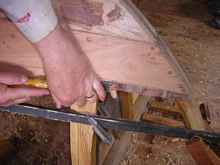
Cutting the rabbets
When you are satisfied that the rolling bevel is smooth and
fair, remove the batten and cut the end rabbets.
 |
Cut below the line with a saw. |
 |
Chisel out most of the wood |
 |
Finish with a rabbet plane |
The ply laminations will show you if it is fair.
| Final rabbet |
 |
I make these rabbets about 16” long and 2/3 the depth
of the plank at the end. When you are doing the rabbet on the
other side make sure the plank ends match up at the same height.
To be continued next month...
*****

|