I became enamored with sailboats and sailing during the years our family lived in Maryland. We would frequently visit Baltimore harbor and I would admiringly gaze at the beautiful, sleek sailboats that would be docked in the inner harbor by the Light Street pavilion and dream about the sailing adventures their owners no doubt enjoyed. Somehow I mistakenly adopted the notion that sailing was for the rich. It would be many years later, while living in eastern North Carolina, that I would figure out that anyone could sail. Have you ever heard of older, used, small sailboats? I bought an older 23’ pocket cruiser while in NC and learned to sail through “trial and error” and reading Sailing for Dummies.
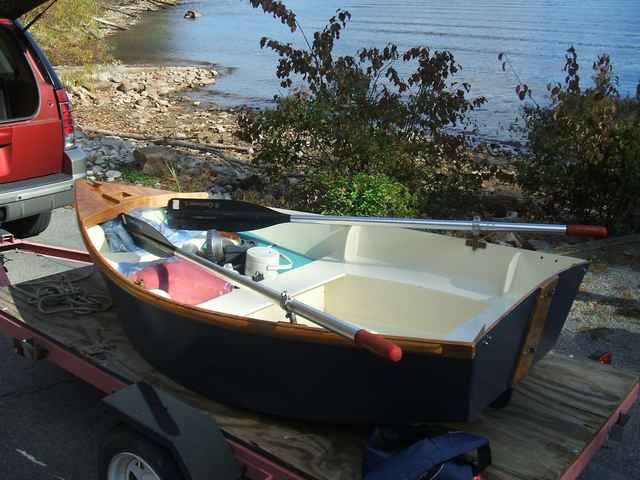
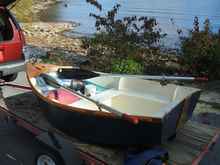
In 2005 we moved to northwest Georgia and hauled our “new to us” 1990 Macgregor 26S. I continued to learn more about sailing and stumbled upon the world of boat building. Over the years I had become the typical DIY’er and the possibility of enhancing my sailing pleasure and “scratching the itch” to build something morphed into a desire to build a boat. After reading up on the subject a bit, I decided to build a stitch and glue sailing dinghy. I designed my own plan, again through trial and error, using card stock and pictures from the internet. I took my card stock model, enlarged the dimensions and built my first dinghy. Pixie, as she was lovingly christened, is 7’6” long with a 44” beam. I rigged her with a used Dyer Dow sail bought on Ebay, a daggerboard and rudder drawn from Bateau’s free plans for the D4 pram, and hardware and lines bought from Duckworks. Here she is loaded for an overnight fall camping trip:
 |
I have enjoyed Pixie, but she is just a bit too small. With my builder’s “itch” acting up, I decided to build a little bit bigger dinghy. This one would be big enough to stretch my legs and big enough for one crew member, possibly two (if they happened to be grandchildren).
When you figure you are going to spend 200 plus hours on a project and then hours and hours of time hopefully enjoying the fruits of your labors, you want to build the right boat. I spent many hours looking at plans, considering building methods, and thinking about what I really wanted to do. If you’ve ever built a boat, you’ve been through this process. I finally decided on another S&G build, the Bateau Semi Dory 11. Here is what I posted on the TSBB forum when I was about to start, “This will not be my ‘dream’ build - just a quick, simple build. My nutshell dinghy at 7'6" is just too small.” Little did I realize that this “quick, simple build” would take 2 and ½ years (including a 20 month pause) and would include roughly 250 hours of build time plus countless hours of “think” time along the way. What my “dream” build will be is still undecided. I just knew this was not going to be it. At this point, I just wanted something to get me out on the water with some comfort and that would not take an hour to set up and another to take down like the pocket cruisers did.
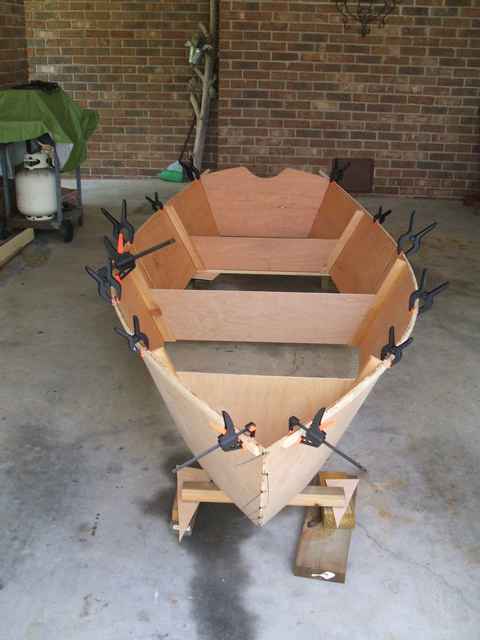
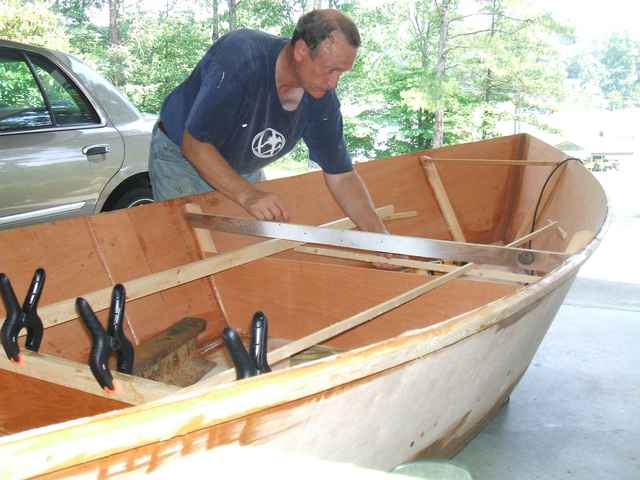
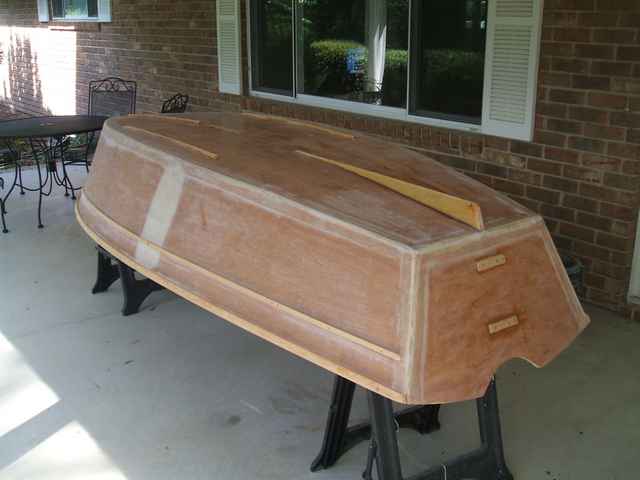
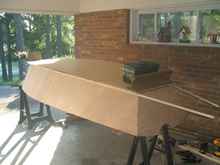
I spent the summer of 2010 into the early fall doing the bulk of the building. In fact, most of the work was done during this time except for the “finish” work. Of course, anyone who has built a boat knows that the finish work can take a very long time. Here is a picture of the early going.
The side panels and transom are stitched together with temporary frames inserted along with the gunnels simply clamped into place for stiffness. You can see my butt blocks. I had been told that they would create flat spots in the hull and they did. I had a little trouble getting those flat spots to “disappear” when I was I fairing the hull. In future builds, I plan to give scarffing a try.
The plans called for plywood frames, but I had the idea that I would use some solid wood in the interior along with a few other modifications. I really wanted this simple, S&G boat to have some class. Little did I realize that every little “mod” would add time and labor to the project. In the end, though, it was all worth it.
The next step was to add the bottom panel to the side panels. I was using ¼” plywood, so I decided to epoxy two thicknesses together to give the bottom of the boat plenty of strength. I offset the joints in the two layers so butt blocks were unnecessary. The plans did not give offsets for the bottom; instead, it called for cutting the panel a little oversized and then marking the outline from the side panels. Here is a picture of the bottom laid across the side panels.
 |
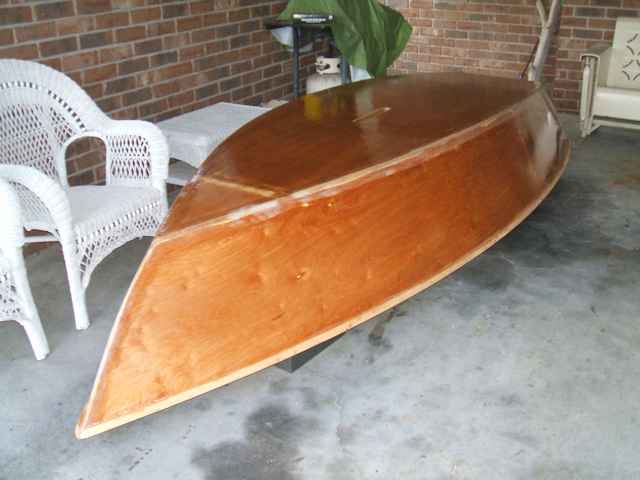
You can see that I screwed temporary battens to the side panels to get a fairer curve. I marked the bottom panel with a pencil and marked corresponding points on the bottom and side panels for the small holes that I would drill for the “stitches”. Once I cut the bottom panel to fit, I stitched it on and then sealed all the interior joints with thickened epoxy fillets and wetted out 3” fiberglass tape. I use wood flour that I get from a local cabinet maker to thicken my epoxy. I ask for the finest saw dust that he has and then I sift it through a wire strainer to get out any shreds of wood. What is left really is fine as flour. It works great. Before doing the interior joints, I applied tape to the outside of the joints to keep the thickened epoxy from getting pushed out when I shaped the fillets. It turned out that my fit was pretty tight and it was hardly necessary. Once the tape and fillets hardened on the inside, I sanded the outside of the joint round and applied a layer of wetted out tape over the joint’s exterior. You can see in the picture that I have also glued the gunnel on with thickened epoxy. The pvc pipe makes excellent clamps for this. Here is a picture of the hull after the joints have been “stitched and glued”.
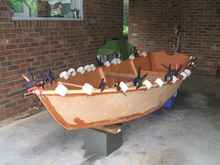 |
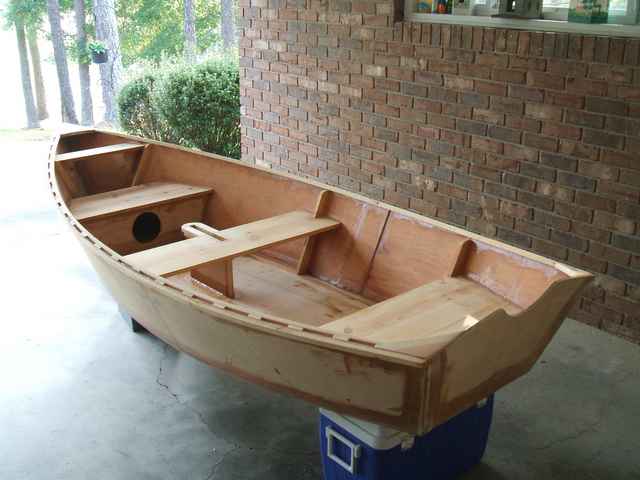
From here it was on to the interior. Since I was modifying the interior, I had to abandon the full size drawings that came with the plans and design my own thwarts and flotation chambers. Here is a picture of some of that process:
In the picture I am using a very primitive method to make sure all of the seat levels are on the same plane. After many hours of work in the middle of August I finished the interior.
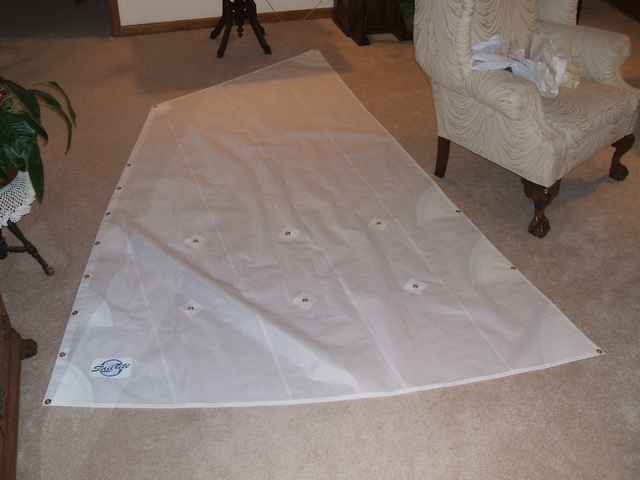
About this time I had to have some surgery which put me out of commission for a couple of weeks. I was not able to do any heavy work but after a few days of recuperation I was able to build my sail from the kit that I bought from Sailrite. They had the specs for the SD11 in their data base; so it was easy ordering. I am not much of a seamstress but overall the project went fairly well. Most of the stitching looked pretty good although I did wind up with a few “rats’ nests”. Here are a couple pictures:
One thing I learned as I was building the sail, it was helpful to get the whole thing up on the work surface, in my case the dining room table. For part of the project, I was letting part of the work hang off the side of the table. This put too much pressure on the material going through the machine. I brought out a second table and this helped tremendously.
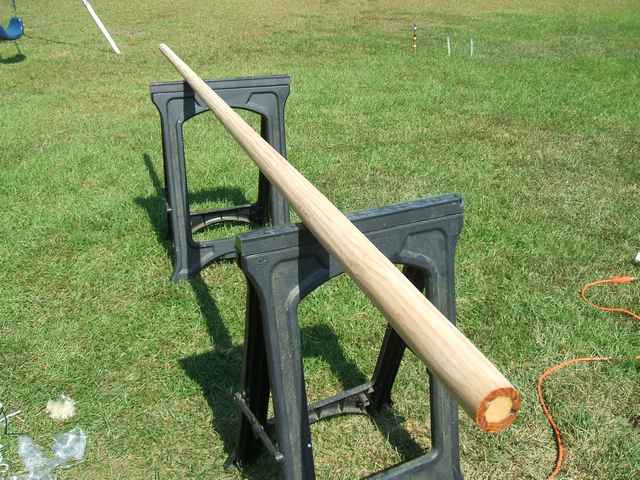
By the time I finished the sail, I was able to get back outside. The next big project was the birdsmouth mast. I had wanted to build a mast using that technique for a long time. It was time to try it. I went to the local lumber store (not one of the big box stores) and asked for a clear piece of spruce. They had a pretty nice piece of wood; so I bought it, took it home, cut it into 8 staves and notched a modified birdsmouth into each one. I used a simple jig to cut them. They were not quite as uniform as I would like for them to have been; but they worked out. I think that a feather board would have helped a great deal. I don’t think my $100 table saw was a great asset, but I imagine a skilled craftsman could have gotten at least somewhat better results than I. After notching the staves, I tapered them with the table saw. I have read that some, if not most, taper their staves with a plane. I only own a small plane and felt I could get better results with the saw. I glued up the staves using short pieces of rope twisted tight with screw drivers. I did wrap pieces of boxing tape around the staves to prevent the rope from sticking to the epoxy. I also wrapped the ends of the tools with tape. It helped, but afterwards all my tools were a bit rough from thickened epoxy getting on them. I rounded the mast with a belt sander using up and down sweeps of the sander. I started with coarse grained belts and worked down to finer grained. I just “eye-balled” it until I got it rounded to my satisfaction. To help hold the mast while sanding it, I tacked two parallel strips of wood onto my wooden trailer bed. They were just far enough apart to keep the mast from rolling. I did have a few gaps between staves that I had to fill with thickened epoxy. I glued a plug into the bottom, sealed up the top and cut a bee hole for the halyard. The mast is not perfect: it has a few “flat” spots but all in all looks pretty nice.
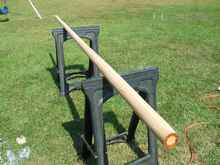 |
As it turned out, the daggerboard and rudder for the SD11 are the very same ones used for the D4; so, I just “borrowed” them from the first dinghy. I did decide to glass them to prevent checking since they were built from ordinary plywood.
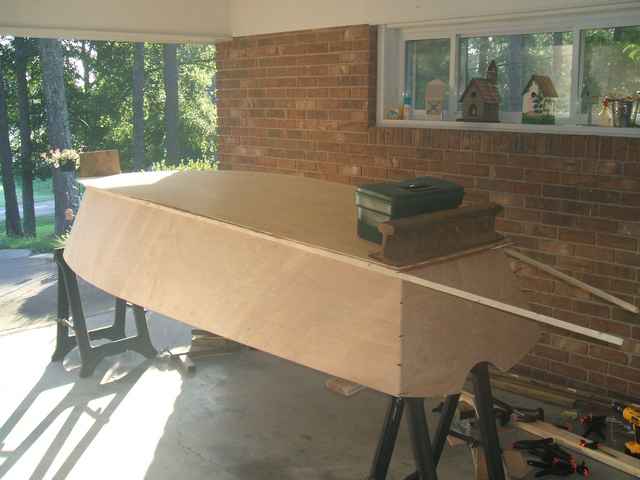
I also glassed the bottom, topsides and sole of the boat. The only thing I didn’t glass was the sides of the interior. If I ever build another boat using the S& G method, I may glass all of the panels before stitching them together. I believe this would save time and probably epoxy, as well as give a better finish. After glassing, I coated the boat with three coats of rolled on epoxy.
For some odd reason, life got in the way at this point in the build. My “little bit bigger dinghy” would wind up sitting on my front porch for 20 months before I would get back to her.
When the spring of this year rolled around, I knew I had to get back to the build. For me, it seemed that “restarting” the project was the hardest part of the whole thing. One afternoon, I just went out to the shed and asked myself what could I pick up to get restarted. I grabbed a can of Helmsman Spar Urethane and slapped a coat of urethane on the rudder and daggerboard. The restart was now underway. Pretty soon I was working on the skeg, sprit, rub rails, fairing and sanding and the refinishing of a pair of oars that a friend had given me.
 |
The dinghy was now ready for paint. I had known for a long time the color scheme I wanted to use: a combination of white with all of the solid wood bright and a red cove stripe. I used Kilz Premium water-based primer, Glidden oil based porch and deck enamel, Rustoleum red in spray cans, and the Helmsman. I had used the Kilz and Glidden on the first dinghy and was satisfied with the results. I rolled and tipped the Glidden and used a very nice brush for the Helmsman. The finish turned out pretty nice. I was able to cut down on the “orange peel” effect that I had on the first dinghy. I suppose with practice I might get even better results. One of these days, I may have to spray one of my builds for a really fine finish. I do believe that my finish would have been even better had I taken a little more time with the primer, letting it set up and cure well and then sanding it really smooth.
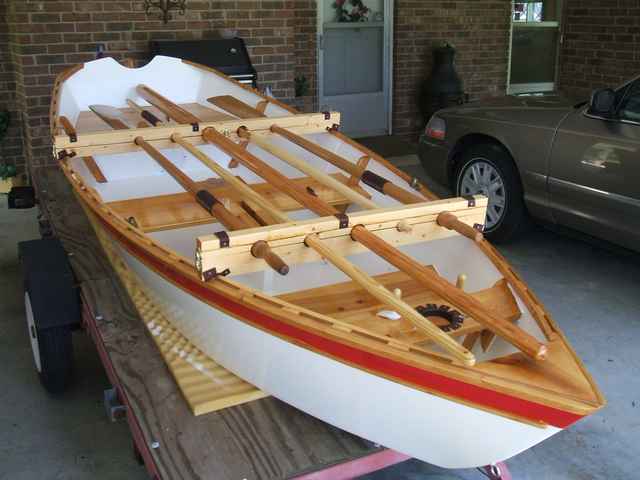
All that was left was some detail work. I leathered my oars and the sprit and made a couple of belaying pins using simple wooden dowels. I cut out the hole in the mast partner and then lined it with leather. I bought a post-hole digger handle for a tiller. I had to flatten the end of it and attach a couple of pieces of plywood so that it would fit over the rudder. It works perfectly. Next I attached my hardware: an eye bolt at the bow, 2 straps on the mast partner for the halyard and snotter, a wooden thumb cleat on the mast for the snotter, a cleat at the base of the mast for a downhaul, two sets of brass oar locks, and the pintles, gudgeons, and a hold-down clip for the rudder. Then I set up my running rigging. Lastly, I made a rack that fits over the rails of the boat to hold the spars, oars and tiller for transport. The boat was now ready to sail!
Here she is ready to get wet for the first time:
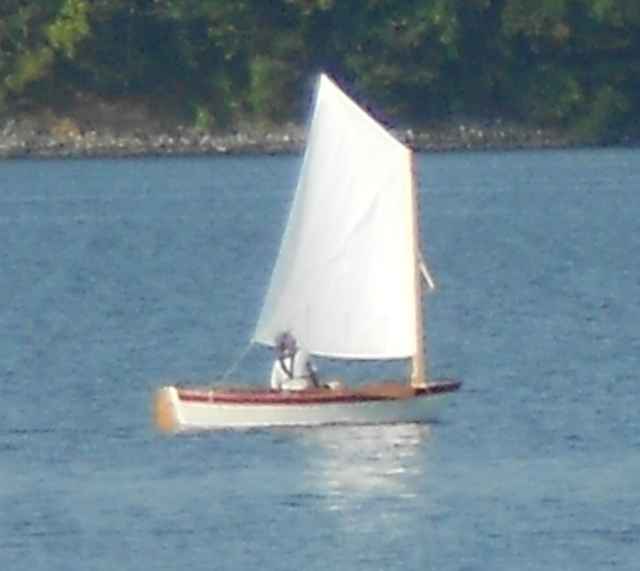
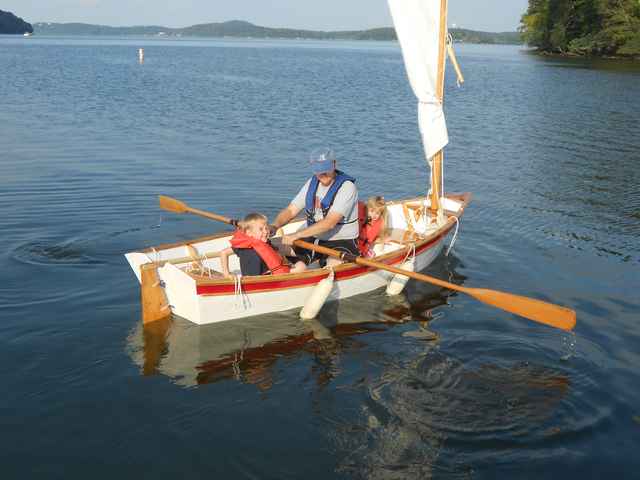
This is the best picture I have of the boat actually under sail. It was taken with a phone camera from some distance.
And my favorite, with two of the grandkids:
Now I have my “little bit bigger dinghy”. I have sailed her several times already and she promises to be a lot of fun. She has garnered a lot of attention at the boat ramp. I believe she will fill the niche that I planned for her all along. Now the only thing I need is a name for her. Any ideas?
|