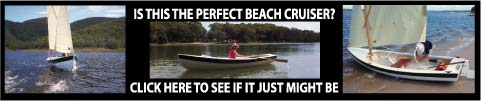
The bookcase boat took the better part of two weeks for me to finish working right up to Christmas Eve day, and I've neglected many of my other responsibilities, including getting the calendars done in a timely manner, as well as my household chores Dixie reminds me about daily. However, my granddaughter's response was worth the effort. "I not only like it, I LOVE it," she told me when I delivered her "Transformer" boat on Christmas morning. It proved handy for putting all the gifts in temporarily as well.
I made some changes from the original plans including making one shelf with less depth than the other so that it could be used to support the other shelf as a seat. Using strapping for hinging the forward deck at the top was also a change since this approach allows the risers to actually support the bow transom and also adds some protection to the banging the bow transom is bound to take from pool edges. Other ideas include using cut up pool noodles as boat bumpers for sailing in a pool, bundling foam packages to fit under the bow and stern decks for flotation, and using an aluminum pool skimmer handle for the mast. The mast doesn't have to be very strong for a 17.5 sq. ft. sail. I'm also ordering a Fathead mini of the Disney fairies to apply to her sail or front deck. They were on sale at 50% off, and it's one of the few materials that stick to polytarp. Look for some unique PolySails next sailing season!
Here's the current plans at the bottom of page, but there is one glaring error on the cut dimensions. The stern transom on Panel 2 and the stern deck support piece on Panel 3 need to be transposed because the dimensions shown for the stern transom are wrong on the Panel 2 cut plan (You can't get both the bow and stern transoms from a 5' 10" piece of plywood). If the bow transom is 3,' the stern transom would then only be 2' 10" instead of 2' 11 1/2". Oops! That leaves a gap of about 2." I also just cut two of the sides up into pieces, using the center sections to enclose the cockpit and fitting them between the support pieces for the fore and aft decks which I accidentally cut and glued in before installing the inside side pieces. Instead of 3" side decks, I just used narrow 1 1/4" strips of plywood to cover the exposed edges between fore and aft decks. These pieces I screwed on in case I ever needed to remove the inside side panels for inspection. The inside side panels are just tight fitted rather than glued or screwed in place. You don't need the 3" wide sides unless you plan to add foam between the cockpit and the sides, but I've left that in on the plans as it was.
 |
 |
 |
 |
 |
 |
 |
 |
 |
I used a lot of bamboo skewers and glue both Titebond III and PL Premium in construction. The bottom was screwed, nailed (bronze boat nails), and glued on. It shouldn't leak. I also re-purposed an older leeboard when I ran out of time to make one as shown in the plans.
Below there is a link to a set of plans with the revisions I made while building. Circled dimensions mean that I made changes from the original ones. These revised plans are probably good enough that most of our boatbuilding friends can use them as guidelines to build a bookcase boat if they want to, and I might never get around to redrawing them. They might result in a new generation of sailors if we can get enough grandpas and dads to build bookcase boats for their young ones.
Download plans here.
|