
 Custom Search
|
| boat plans |
| canoe/kayak |
| electrical |
| epoxy/supplies |
| fasteners |
| gear |
| gift certificates |
| hardware |
| hatches/deckplates |
| media |
| paint/varnish |
| rope/line |
| rowing/sculling |
| sailmaking |
| sails |
| tools |


| join |
| home |
| indexes |
| classifieds |
| calendar |
| archives |
| about |
| links |
| Join Duckworks Get free newsletter CLICK HERE |
|
|
| DIY Johnson Carburetor Reconstruction |
by Jim Borch - York, Pennsylvania - USA |
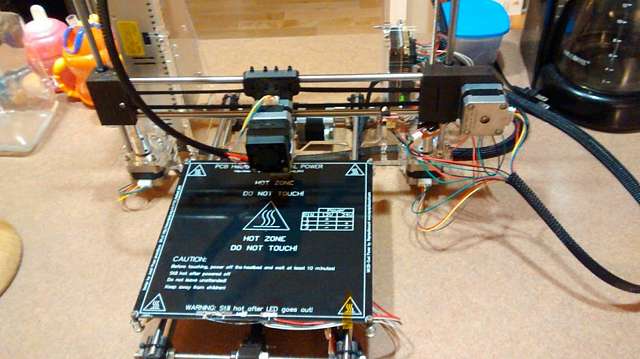
I own an outboard motor that I love, a 15 horsepower Johnson from the late 80's. They made a bazillion of them, they're ample power for a fishing boat, reliable, what's not to love. Well, they're almost reliable. They have one fatal flaw, which is the stupid plastic top cover of the carburetor that has an unfortunate tendency to crack. Once it cracks you either can't run the motor period, or you can't idle & have to play with the choke to give it gas. The problem is that it lets air into the low speed fuel circuit. Anyway, mine's been cracked for years now. Each year I glue it up again, and get most of a fishing season out of it before the ethanol in the gasoline softens whatever glue or epoxy I tried that year (thank you feds) and it starts acting up again. You can get replacement parts but they aren't cheap, and my general mentality on this sort of thing is that I'd rather know how to build it than where to buy it. Problem is this is a pretty intricate little part, and I've never had the means to construct a replacement until recently, when I built a 3D printer. Here’s a little background here for those unfamiliar with the technology; these have been around for 20 years or so and are simpler than you think, though only recently have great strides been made in bringing them to consumers like myself. Just like a milling machine moves a cutter around along the X, Y, and Z co-ordinates to cut a 3d part from a larger blank, a 3D printer moves a little head around the X, Y, and Z axes with an extruder, which is essentially a hot glue gun nozzle being fed with a plastic filament. It builds the part one cross section layer at a time, being controlled by a computer. Here's my printer:
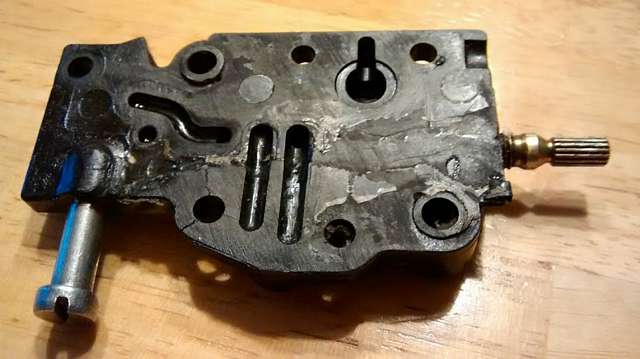
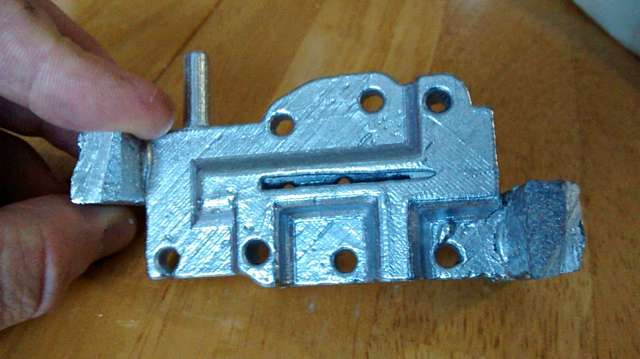
Now, on to the carburetor. This is the part I need to replace:
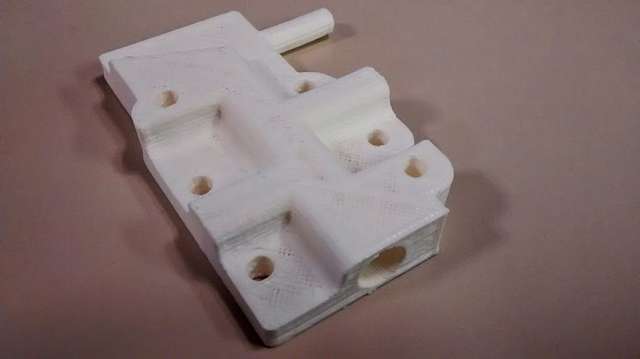
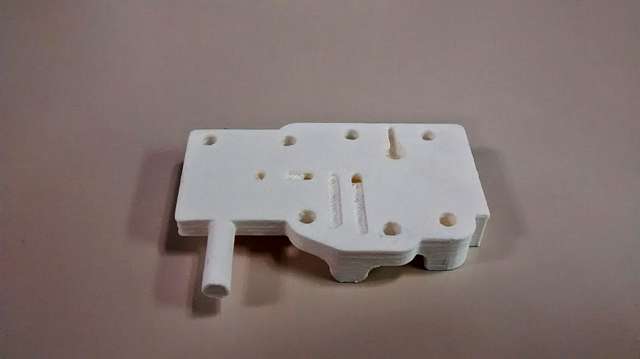
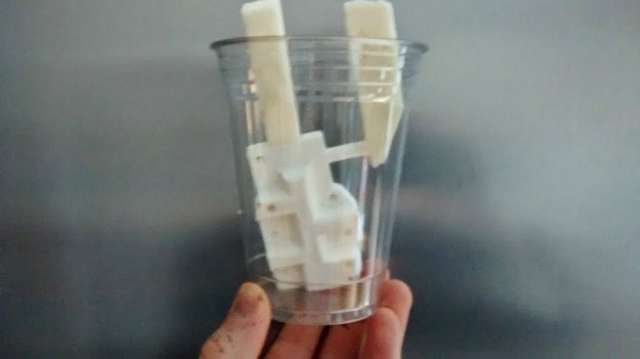
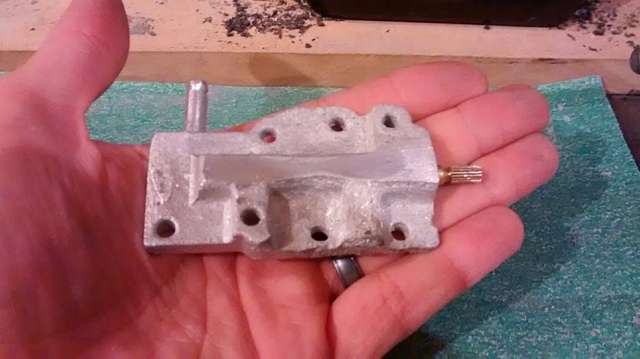
You can see the gnarly looking crack running through the part, and the evidence of many failed repairs. The first challenge is that you can't just go and download the files to make something like this, but fortunately I have some good CAD software called SolidWorks. CAD software allows you to make a 3D model of parts & mechanisms, so all I had to do was bust out my handy dandy vernier calipers & transfer a bunch of measurements to the computer, and I had a slightly modified version of this part. I say slightly modified, because this part was designed to work on a couple different engines, and I removed the features I don't need on mine to simplify things. Step 2 was to actually make the part (or really just the blank for the casting, but more on that later). I fired up the printer, fed it the data from my cad system, and sat back drinking coffee while it whirred & hummed and built my part for me. Here's the printed part:
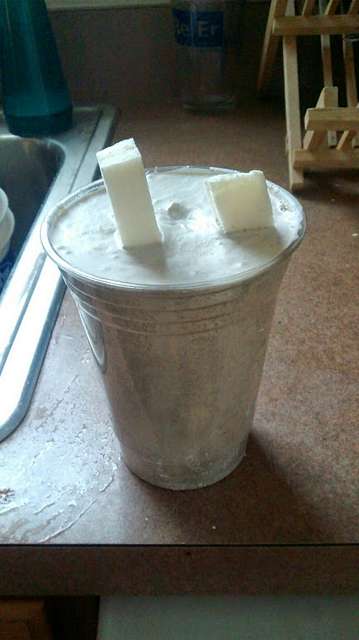
So, now I've got a replica of the original part, but unfortunately the material used by a 3d printer won't stand up to the heat it'll encounter when bolted to a running engine. The original part was a thermoset plastic, so it would take the heat, but you can't 3d print thermosets. The solution is to use the print as an investment casting blank, and reproduce it in aluminum. I've dabbled with metal casting for some time now, so I already have a little propane furnace to use, but if you don't they're very simple. All you need is a couple steel buckets (in my case an old 15 gallon grease drum) lined with a mixture of fireclay & sand, and the burner is nothing more than a couple bits of plumbing hardware. The first step in preparing the investment cast is to attach a couple pieces of foam to the part to act as a sprue (where you pour in the molten metal) and a riser (a place for metal to flow out the other side, so you know the mold cavity is properly filled).
Next, you mix up your investment slurry, which in my case was simply 50/50 plaster of paris & fine sand. You pour this mixture into the cup with the part, making sure it fills all the little nooks & crannies (I used an eyedropper to squirt mixture into the smaller cavities to make sure they were filled). It helps to vibrate the whole thing (I used an orbital sander held against it) to allow air bubbles to escape, but very quickly the mixture will begin to harden. Here's the result:
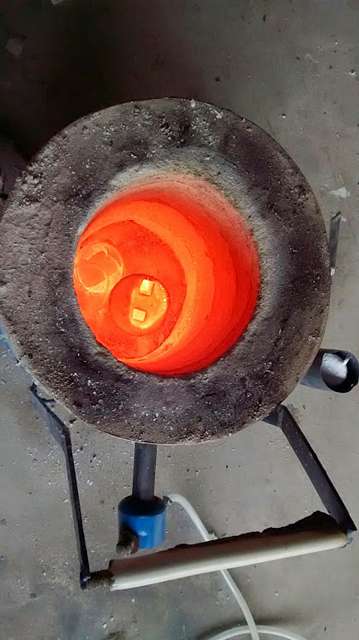
Now, you have to burn out the mold. You need to heat it up until its red hot, and all the plastic will burn away leaving an empty cavity in the exact shape of your original part:
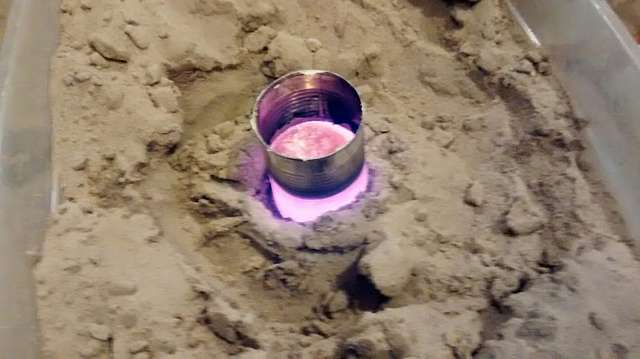
Finally, you pull the mold out of the furnace, and set it in some sand (so any aluminum you spill is safely contained). Melt down some aluminum in the furnace, and pour it into the mold:
The tin can is to give a little extra head pressure on the mold. You can see the molten aluminum glowing. Now, wait a while for everything to cool down & solidify, and then bust apart the mold to see your part waiting inside. I have to admit, on my first casting I made a foolish error. You see, when aluminum cools, it shrinks by around 2-5 % based on what type of alloy it is. I neglected to account for this, so my final part was 4% too small. No worries, just print out another scaled to 104% and try again! Here's the result from attempt number 2:
As you can see, while the casting was beautiful, there's a void in the top of it into the idle screw tunnel. Yeah... I could probably patch it with something, but I'd rather do it right, so I printed another copy and tried again. Success!
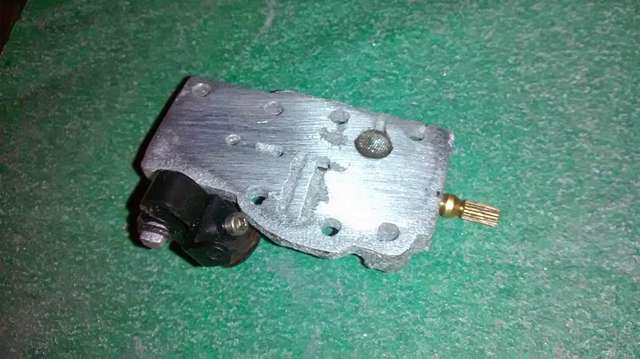
This casting is actually a little rough, the way it cooled caused some serious shrinkage so the surface finish is lousy, but all the important features are there in the part, and after a little cleanup with some sandpaper it doesn't look too bad. The only other work it needed was to tap 1/4-28 threads in the front of it for the idle screw, drill out the tiny idle port at the end of that tunnel, and bolt it up!
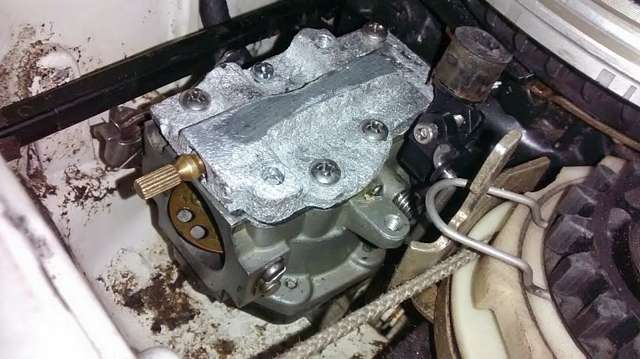
At this point I tried to start the engine. To be honest, I was a little surprised when it fired right up! However, it didn't run right. It wouldn't run without using the choke, and adjusting the idle screw didn't really seem to have much of an effect. So I popped the cover off and sat there scratching my head for a while. First thing I tried was a new gasket, I'd reused the old one and it was looking pretty gnarly. So I cut a new one from some gasket material (if you're going to tinker on old engines, don't buy gasket kits, just get a roll of gasket material and you can make whatever funky gasket you need). Tried again to run it and it still wouldn't run without the choke. Took it apart, more head scratching and I noticed that my new gasket was very slightly covering a teeny tiny little fuel port where I hadn't quite cut one of the openings right. Snip snip with the scissors, put it all back together, and tried once again. This time, it ran right! It warmed up for 30 seconds or so, and I was able to turn off the choke & bring it down to a nice idle. I'm calling that a success. The motor runs right again, and well in time for fishing season! Jim |
To comment on Duckworks articles, please visit one of the following:
|


 |