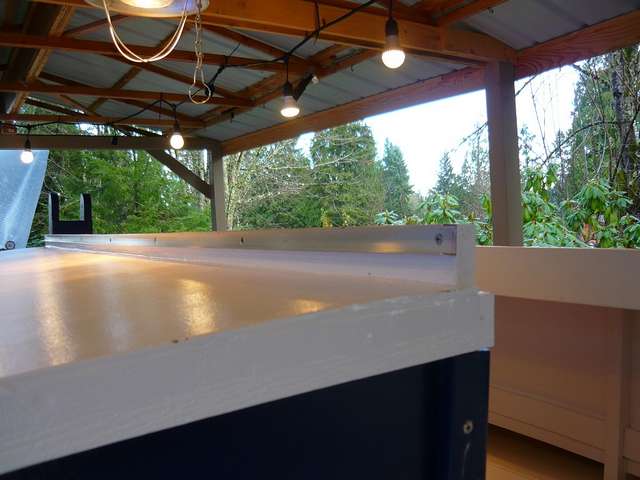
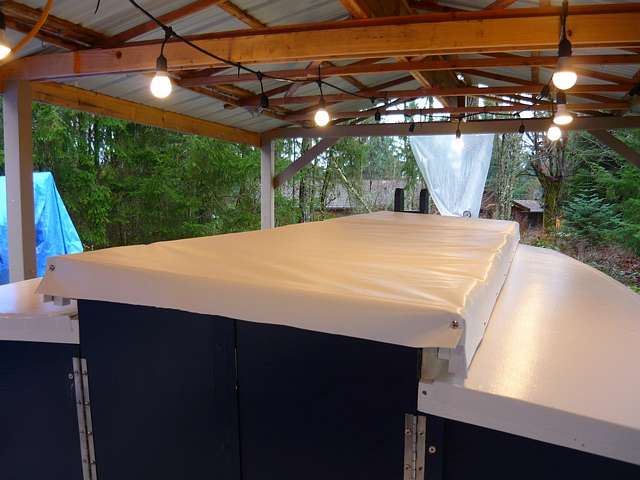
As somebody who likes to build boats for a hobby, and mess about in them, I have been a long admirer of the usable designs Phil Bolger has developed. I built my first "Bolger" boat in the early 1980's while living in Gloucester MA (Phil's home town) and since then have incorporated many of his ideas in the small boats I have built. My latest project is a 21 ft Sharpie for my daughter and son-in-law. Since my son-in-law is 6'3" and the cabin height is only 4 ft I decided that Phil's idea of a full-length cabin hatch was something I needed to include.
The major problem I was facing, however, was a cabin length of 7 ft. A solid 7 ft hatch would have been quite heavy and difficult to hinge along one side. I liked the ideas of Gary Blankenship I saw in Duckworks Magazine, but it still seemed a bid daunting. I had almost decided to scrap the full length hatch when I realized that the hatch does not have to be solid. What if the hatch is made of a marine vinyl cloth that can be slid along the hatch coaming? This concept has been discussed, but I have never seen anyone trying it. Well, there is always a first time, so I decided to try it. Here is a description of my first attempt, and I think it will work.
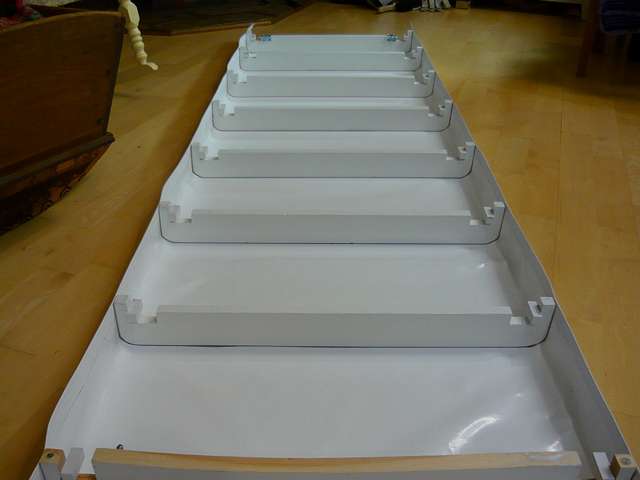
The basic structure is marine grade vinyl fabric stretched onto wood ribs with the ribs having small blocks that ride in aluminum U-channels that are attached to the outside of the coaming (Figure 1).

Figure 1 |
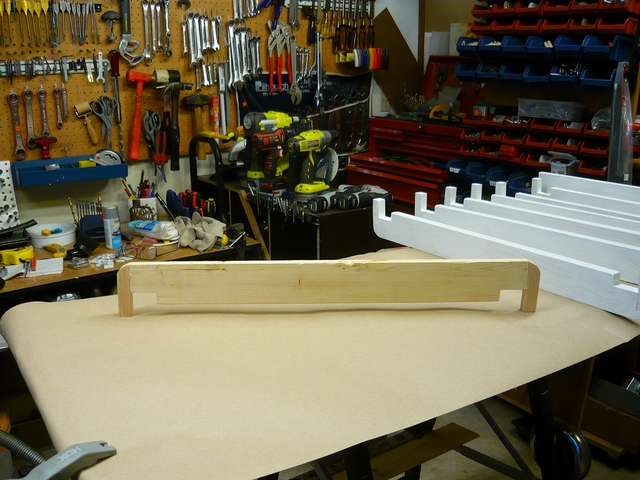
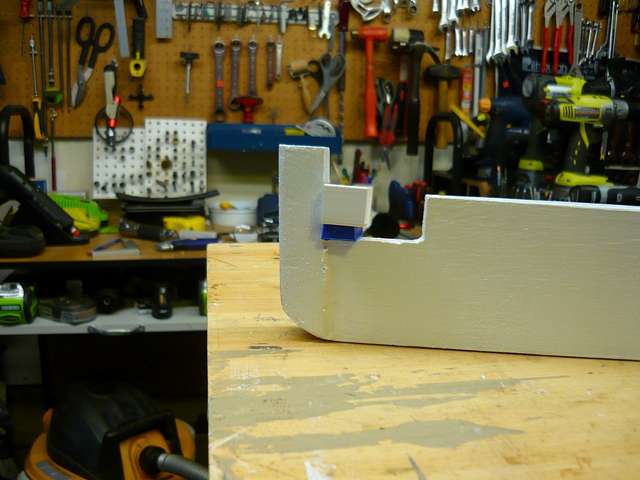
Figure 2 shows a rib made out of 1x3" lumber with ¾ " square wood extending down the sides. The slides are 1.5 inches wide and can be any height that is a little less than the opening of the aluminum channel. I used some ¾" x 1.5" PVC trim boards I bought at Home Depot.
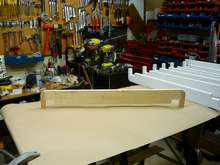
Figure 2 |
I use PVC to keep the sliding friction to a minimum (Figure 3). The picture also shows the ¼ inch shim I used to set the exact distance as I attached the slide.

Figure 3 |
I cut the vinyl width so it was exactly the distance along the outside of the rib, plus 2" for hems (1" on each side). In my case that was 23.5 + 2" or 25.5". Then I hemmed the sides with 1" hems. This width gave me enough material so the truss head screws I used to attach the vinyl to the ribs would go through 2 layers of material.
To simplify the process of attaching the vinyl to the ribs, I used double sided, exterior grade, foam tape. I used the 3-M product since past experience has shown that this works best for me. Other brands such as Harbor Freight, don't last long in the harsh marine environment. I put the tape first on each rib and then taped the rib to the vinyl along lines I had drawn. The truss head screws were used to permanently fix the vinyl to the ribs
(Figure 4).
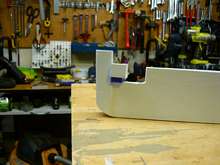
Figure 4 |
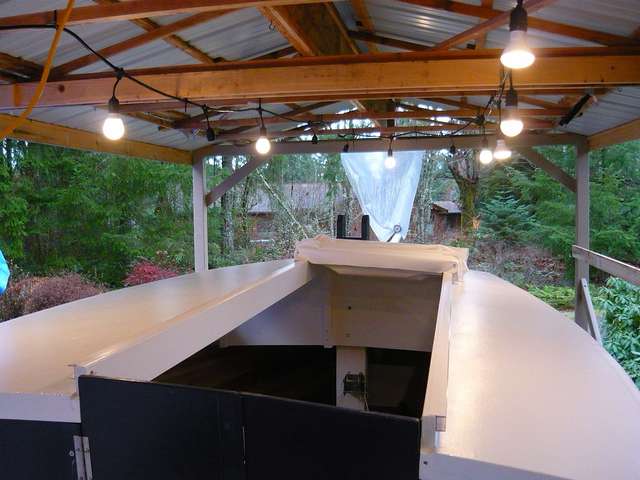
The final step was to attach a gate latch to the outermost ribs (forward and aft) on each side. These latches had a ¼" rod that could slide into predrilled holes in the coaming. The cover is now in place and can be opened from either the bow or the stern.
The vinyl and ribs can be compressed to about 1 ft, so actually this in not a hatch that spans the entire cabin. However, it can be opened from either end and will not interfere with the handling of the mainsail.
I have not yet finished the boat, so don't have a discussion of how it actually works in reality. However, the initial set-up and testing suggest it will work well. The hatch can be opened while under-way.
I bought the vinyl at Rochford supply. They often have the best prices. They have different grades and colors so you can pick and choose what you want.
|