
 Custom Search
|
| boat plans |
| canoe/kayak |
| electrical |
| epoxy/supplies |
| fasteners |
| gear |
| gift certificates |
| hardware |
| hatches/deckplates |
| media |
| paint/varnish |
| rope/line |
| rowing/sculling |
| sailmaking |
| sails |
| tools |
 |

| join |
| home |
| indexes |
| classifieds |
| calendar |
| archives |
| about |
| links |
| Join Duckworks Get free newsletter CLICK HERE |
|
|
| A Home Depot Sailboat for the Sea Cadets -1 |
by Richard Ilfeld - Apollo Beach, Florida -USA |
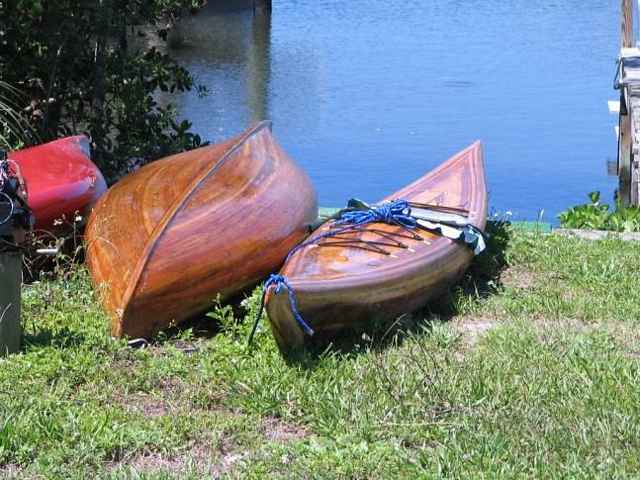
Part one - Part Two - Part Three - Part FourThe Challenge: a fleet of boats to teach young people to sail. Issues: Cost. Storage. Getting to and from sailing grounds. Safe, gentle boats. Cost. Volunteers. Suitable location. Did I mention Cost? I had been teaching a group of Sea Cadets some basic homebuilding airplane technologies. The question came up in conversation about the issues involved in teaching them to sail. A common solution is a yacht club, marina, or camp with a fleet of small boats. These tend to be relatively rare opportunities, and not available to all organizations. Some instructors are OK with a bunch of people on a bigger boat - others not so much. There are as many opinions as there are sailors. But fleets of little boats for beginners aren't necessarily easy to find. When teaching airplane tech, the simplest airplane is pretty complex. We teach a little & build a part. We can't usually build a whole plane, although high school shops sometimes do so over a school year. But, just maybe, we could build a simple boat. Lots of today's kids can build an 'app'. With a little motivation and effort they can acquire still satisfying handskills to build a boat. Here's the fantasy: a day camp for a couple of weeks, or a half dozen weekends, where the kids learn the basics of sailing in class, build a small boat, learn to sail in it, then take it home. Something so simple that it can be kitted up in a garage by volunteers without special boatbuilding skills, then built by kids using simple tools under a day camp picnic shelter. A $200 price point would be nice, too, in the range of a cheap molded kayak, or one of David Lucas's foam boats. Mulling it over, it seemed possible. But we have to start with a suitable boat. Serviceable, proven, tolerant of some funk in the construction, and cheap. We've all seen the neat little class boats or dinghies yacht clubs take out in groups for sail training and kid's races. This is not that boat. I choose the June Bug. It's an old design, introduced by Bolger in 30 Odd Boats, and reprised by Payson in Build the New Instant Boats. It is, by reputation, an adequate sailor. It can also use paddles, oars, or a small motor. We can teach sailing, a father and son can mount a kicker and go fishing, 4 kids can have fun together and row around a lake. It is car toppable, stackable, and rugged enough to be dragged around, and can live outdoors beside the garage. It is plausible that a 16 year old taking one home from camp today could give her toddler a ride in it a few years hence. Can young people without shop class build it? Can adults with some hand skills kit it up? Can we do it in a non-shop setting over a few weekends, use it for sailing lessons, then have the campers car top it home as their boat? Can it happen in a $200 window? It might be the boat from La Mancha - the impossible dream. Well, we won't know if we don't try. Let's make sure any group can build it anywhere. Rule 1: everything should come from Home Depot - or at least be available there. The cheapest good wood available is often #2 construction grade 2X4 X 8' boards. Especially good if the store puts out a couple of bunks, and lets the consumer select. So we'll make our June Bug out of cut up 2X4's. Pick straight, light to medium weight ones. The dense ones yield strips that bend with more difficulty. June Bug was designed as a plywood boat, but I don't like plywood boats much: personal preference - folks are free to differ. I have no problems with marine plywood. But this is a low cost boat, and there are a number of issues with low cost AC construction grade plywood; plus it's not so low cost anymore. The waferboard that has replaced most plywood isn't my idea of seaworthy. This is a kid build boat, and little sticks are easier to handle than plywood sheets. I have strip built many boats and like the results. Here are a couple.
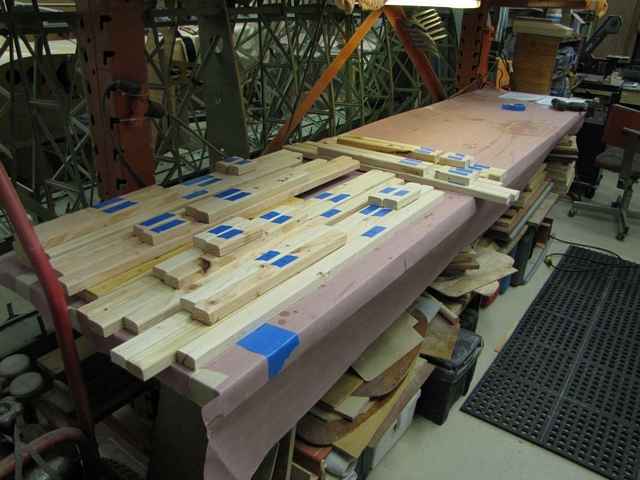
But mainly, I am biased, pigheaded and stubborn and this is my plan. I like to pretend this is leadership. P. S. I'd love to use cedar. Easier to handle, naturally resistant to rot, and very pretty. It costs three times as much though, so it's reserved it for my strip built SneakEasy, but that's another story. I redrafted the June Bug to be built from 2X4's. Reduced it to a table of dimensions appended to this article. You can kit this boat with a table saw, and a simple square jig on a layout bench - fast and efficient. RIp 1 ½" by ¼" inch strips for the hull and ¾ X ¾ strips for the Mast, boom and longerons. Make ¾" X 1 ½" strips for the jig frames, and some ½" X 1 ½" strips for the decks and thwarts, skid strips and gunnel. Used a 10" home table saw with a narrow kerf blade. The good many-tooth carbide blade cost half as much as the saw and was worth it. Saws can be rented, if nobody in your group has one. You'll need about 96 usable strips for the hull bottom and sides. About 24 ½" X 1 ½ - maybe a few more for the boom and oars. I like the properties of laminations, and it's a good table top task for young people. It also consumes lots of small pieces - there was really no scrap on this project. The various layups use a lot of 12" pieces, to consume those that come from strips with knots and cracks. Ripping only took a few hours: Here are all the jigging/framing pieces laid out on the bench. I'm too old to remember stuff so I label everything - that's what the blue masking tape is. We are making up a "boat kit"; pre-fabbed for transport to the camp setting where the campers with supervision will build them. For folks in areas afflicted by winter, the setting might be a church rec center once a week seasonal activity that would result in a fleet by spring. I believe two adults with average hand skills could make 8 kits in a 2-3 fairly easy days, after fumbling though a prototype first. The frame set for a June Bug isn't especially imposing.
I made a simple plywood squaring jig and laid the frames up freehand around it flat on a bench; glued up the frames with hot glue then secured them with sheet rock screws. Please note some tolerance in the joinery and knots in the wood. This is a kid's boat to be built by probably inexperienced kids. Some funk will happen & I found this construction method is more tolerant of errors than the original plywood design. The framing needs to be good enough to hold itself together for construction. Sandwiching with glass and epoxy will make the boat strong and cover all the funk. Paint will take care of the cosmetics. Your crew will be impatient. There will be flaws, so the design must work well if built less than perfectly. All are screws drilled with a countersink, so the beveled heads of drywall screws don't split the thin wood. I stripped out the transom frame on the bench, and fibreglassed it. The edges are rough so there will be a ¼ sleeper to bed the bottom hull strips. (Note - Transom should be 1 ¼", solid ¾ with veneers both sides. I did the prototype as a frame [pictures] but corrected it later to a solid as I built the boat out. This was to allow a 2 HP motor to mount directly (with a gap in the afterdeck). For a more pure sailboat, framing and a ¼ inch veneer as shown in the early photos is fine. Dwelling on this to make the point that this design is not cast in stone, and the construction allows for easy field modifications. Transom should be notched and beveled as other frames. You can bevel all the frames on the table saw. Be sure the screws are well counter sunk if you plan to do this!!! Also, we laid up rudder and leeboard blanks to ¾" thickness on the bench using epoxy & crossbanding 1/4" boards. With all the pieces precut, this can be done in the field. This is a good table top task to work on during epoxy cure cycles for the hull. The degree of prefinishing the kits will, in part, depend on the camp time available for the build. I built the rudder straight - plan to modify to a kick-up later. For work flow channel your inner Henry Ford, but keep the kids busy at all times. Use Poly sheet to cover the work surface, epoxy will not stick to it. If you toss out the really warped pieces you can clamp these blanks up with masking tape or weight them with bricks - great force is not required with epoxy as it bridges small gaps well. Here's the entire boat leaning up against the wall, including the built up frames, and the jig and buckets to support it. This is a June Bug boat kit. (Sorry about the welding rig foreground, my hanger is overcrowded.) |
To comment on Duckworks articles, please visit one of the following:
|


 |