| 
Building Guppy
(part 1)
by Steven Lewis
Part
2 - Part 3 - Part
4
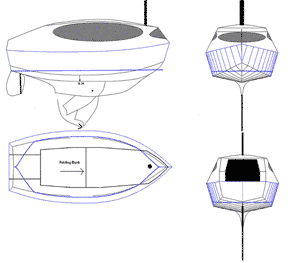
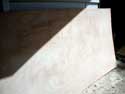
This is a blow by blow account of building GuppyII. GuppyII is a slightly stretched version of Guppy (pictured below). It has been stretched by about 2.5 ft and the shear line has been raised 1", making it a fraction of an inch wider. The cabin height will be shortened by that inch so the overall height will stay the same. It is being built by Stitch and Glue methods.
(click images for larger views)
I picked up some white hardwood plywood at Lowes and this is what the tag looks like. (about $12/sheet)
|
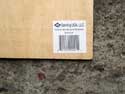
Hardwood label |
It is similar to A/C plywood with one side good and one side not so good. It does have 5 relatively even plys to it though and what voids there are are almost microscopic.
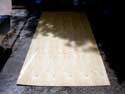
B side of ply |
A side of ply |
Half for bottom
half for sides |
The bottom and sides consume the better part of 3 sheets of ply (1.5 sheets for the bottom and 1.5 sheets for the sides (combined)). One of the sheets is cut in half widthwise. To offset the splice areas, the bottom splice is in the forward part of the boat and the sides are in the after section. To start: Cut your single sheet and put aside the longer piece. Take another sheet and put it face down (bad side up).
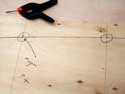
Start laying out your bottom panel. I use the edges of the ply as my base lines but it would probably be easier (especially when cutting) to mark in a baseline along the length of the bottom of the sheet, say 2" up from the edge. Don't bother with the width as there is only one point on the edge of the ply.
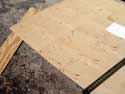
Plotting X and Y points
|
Using Square to get points plotted accurately
|
Taking your numbers from the offset table, mark your stations. The top line will have a few stations that don't match the bottom so you will have to measure separately for them. There is a total of around 15 stations to mark(for each set of panels). In the pictures I show how to plot the X,Y and X2,Y2 points.
Marked panel cut off, ready to be faced on other piece |
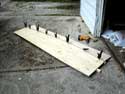
Pieces faced, nails put in and batten sprung and clamped
|
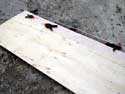
To conserve plywood I cut the first half of the bottom panel just above the X2,Y2 plotted points. Then I flipped the remaining ply over (good sides facing, factory edges on 3 sides) to give me mirror panels. I screwed the panels together (ensuring that everything matched) so I could cut them out in one shot. Whatever is left of the middle can be used elsewhere. I used lots of screws, inside the lines and out, because my ply panels were warped and I needed to get them together to get proper mirror panels. Your screw mileage may vary. The holes will be filled in later.
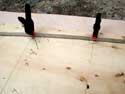
Nails placed offset so that edge of batten runs thru point
|
Line connecting points drawn
|
Offset nail holes and line
|
Using a 1/8" x 1" x 8' piece of aluminum as my batten and nails offset 1/8" outside my panel, I carefully lay out my lines. Don't worry too much if the forward part of the lines don't look quite right as we will fix them later when we extend the line. If you have a long enough batten you can do it all in one shot, but I don't so here is how it is done with a too short batten. By the way, Stitch and Glue is extremely forgiving, so a gouge or mislayout of 1/8" or even 1/4" can be easily corrected by smoothing down or filling in the gaps with thickened epoxy, so don't freak out if you wobble a bit on layout or cut out.
completed line
|
Continuing onto other panel
|
Overlapping points to get true and fair line
|
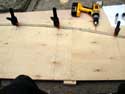
Next I take my short piece of ply and cut it to match the rest, then screw it together and butt the factory edges up against the long panel. I continued to lay out the rest of the points and mark them. I screwed the panel edges to a couple of 2x4's to keep the edges aligned while I plotted the points and cut the panels. When connecting the points on this second piece of ply, make sure you overlap a couple or more of the points on the previous panel and extend beyond the end point, to ensure a smooth and fair line.
All lines done, ready for the cut
|
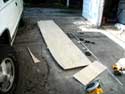
Waste and bottom front cut
|
Finished cutting
|
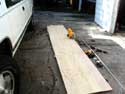
With the panels all marked, it is a simple process to set your circular saw to about 1/4" past the thickness of your ply and cut the curves. You can also use a saber (jig) saw, or even a hand saw (good luck!). I supported the panels on the ground with a couple of sacrificial 2x2's, just to keep from sawing concrete.
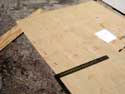
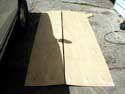
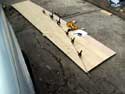
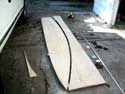
| Here we have the bottom panels cut out, ready for taping together. |
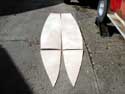
Mirror Panels ready to be put together
|
Stay tuned for Part Deux!
Steve Lewis
On to Part 2
|