 |
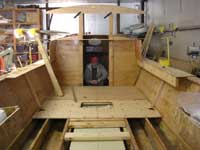
In our last update (3) we had just turned the boat over and started getting the floor ready and the cuddy built. In this form of construction, plywood parts are cut and fitted, then epoxied together and later taped and finally glassed all over. |
 |
Since there is no framework as such, the fitting part can be puzzling, especially when there are so many intersecting angles and curves. Jim did a lot of head scratching during this phase. The vertical blocks shown here are temporary supports to hold the side of the cuddy at the proper angle while the epoxy sets. |
 |
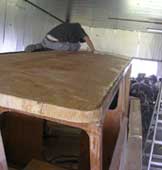
Once the front and sides of the cuddy are in place, it is time to fit and glue the roof. |
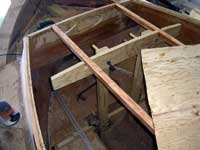 |
Here you can see the temporary supports that hold the ceiling beams in place while the whole assembly (top and beams) is glued together. |
 |
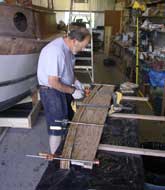
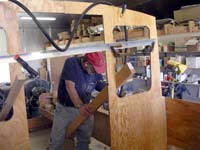
Once all is stuck together, Jim will glass the whole cuddy. In this picture, Jim is filleting the side deck/cuddy joint as he will all joints before he tapes them. The result is a very strong structure. |
 |
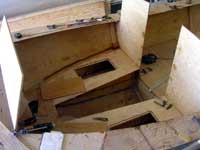
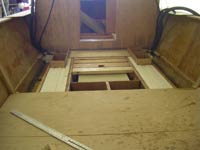
The next chore is to make a bed for the belly tanks. Jim put the tanks upside down on a bench, then formed the ply and glass "cradle" right on top of them. |
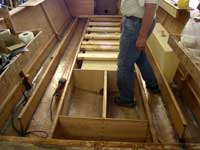 |
Here the cradle has been glued to the bottom with a space for ventilation underneath and the tanks have been placed in it. Then 2x6 floor joists have been placed crosswise to support the floor. |
 |
After a few of of the floor pieces are set in place to make working in the boat easier, the first of the pilot house is clamped up. Jim fussed a bit over the height of the ceiling, wanting to get the trade-off between headroom and windage just right. |
|
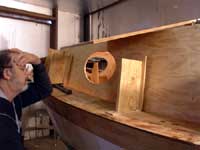
Once that is decided, it's time to start the rear pilothouse bulkhead. In this picture, both panels have been fitted into the space and Jim is working on the layout of the windows and door of the other panel. |
 |
At first the rear pilothouse bulkhead is loose. Jim has to use various braces to hold it in proper alignment while he glues it to the sides and bottom. |
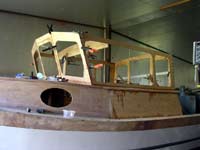 |
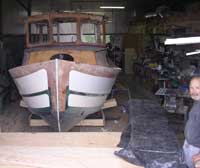
With the forward pilothouse bulkhead in place it is starting to look like a boat! Jim ordered custom made laminated glass windows with aluminum frames. The forward center one will hinge out, the side windows will slide and the rest will be stationary. |
 |
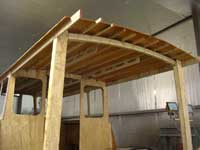
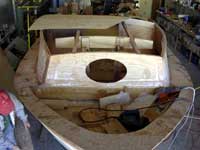
Renn specifies a light cabin top, but Jim wanted to be able to walk on his, so he used a series of stringers, two of which have hand-holds. The top will extend part way back over the cockpit - a concession to the cruising he wants to do with Mary. They have the Inside Passage in their sights. |
|
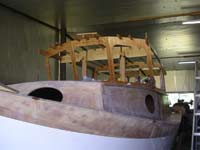
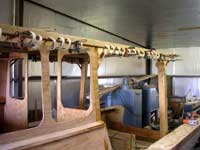
To support the aft part of the curved cabin top, Jim made a laminated beam of White Oak. |
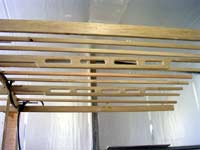 |
Here is a good view of the stringers extending back from the rear Pilothouse bulkhead - note the hand holds cut in two of them. The laminated beam will support the stringers toward the rear - the right in this photo. The beam, in turn will be supported by a pair of posts extending up from the side/bottom of the cockpit. |
 |
Before this can happen, though, the bottom must be installed. And before the bottom is installed, the flotation must be cut and placed. Jim used white bead-type styrofoam in 2 inch sheets that were 2 feet wide and 8 feet long. After checking the gas tank plumbing, the decks were epoxied down. Note the gas filler and vent hoses near the bulkhead on each side. |
|
Now you can see the laminated beam and the posts that hold it. Jim figures he will take some flak for sissyfing Renn Tolman's no-nonsense boat with such a contrivance, but he points out that when he is done cruising and back to fishing, he may chop that overhang off, if not the whole Pilothouse. |
 |
Since there are few ports of call along the coasts of Alaska and British Columbia, Jim is installing a rainwater catchment system. Here you can see a side gutter going on the cabin top. |
|
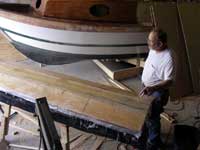
The perspective of this photo belies the fact that this is a very large boat Jim seems satisfied with it. We are scheduled to pull it out of the shop next week so Jim can put it in storage for the summer and go back to the Northwest for a season of fishing - culminating in the annual Salmon run. |
|
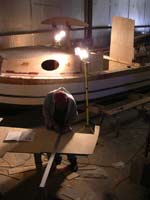
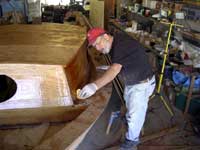
Before the boat comes out of the shop, Jim wants to get all surfaces glassed (here the roof gets a fill coat) so that changing humidity and temperature won't affect it. Come fall, he will bring it back and park it outside the shop for the rest of the construction.
...to be continued... |