Part One - Part Two
In 2003, things were going flat-out in my workshop in Wynnum, Queensland, Australia. There were two of us working full-time, and one working part-time, and yet we were building up to six boats at one time. In addition there was design work to complete, as well as day-to-day stuff like retail sales and sorting through the accounts. At the time it was a kaleidoscope of activity, with fourteen-hour days and doubts about where the money would come from, but I still miss those days....
|
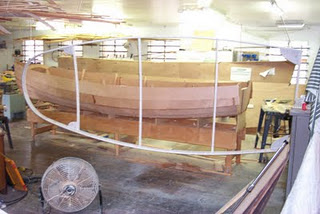
Busy Workshop - at the time I think there were five boats under construction and several repair jobs in progress, like the one in the foreground. We were even doing things like repairing a Wurlitzer Jukebox at the same time! |
Anyway, one of the many interesting projects that we were approached to build was a Putt-Putt Boat of the old style. Our customer wanted a simple, low speed launch to take himself and his wife on gentle outings upon the Fitzroy River in Rockhampton. Bob's wife had been diagnosed with a serious illness, which complicated the process, but they both looked forward to lazy, quiet days on the river. Their boat would be called, "Picnic".
As was often the case in those days (and is still the case today!) I was frequently called on to choose a suitable design as well as to build the boat. I knew of a 14 ft Putt-Putt design from the board of Australian designer David Payne, which had a very attractive shape and suited the function very well. I had seen a number of these boats on the water, but they all seemed to lack buoyancy when loaded with the engine and a crew of two or more adults. In addition, they seemed to trim by the bow, which was not surprising given the very fine sections up foreward, and the small size of the boat.
With this in mind, I suggested to the owner that we lengthen the boat on the same sections to increase the displacement without altering the character. My suggestion was to increase the station-spacing by around 10% to end up with a boat of 15ft 6ins (4.724m) on the same beam. I contacted the designer, David Payne, and was given permission to go ahead with the proposal. In addition to the length increase, I moved the location of the engine aft slightly to further aid the lack of buoyancy in the foreward sections. All of this proved to be highly successful in use.
The matter of power-plant was extremely important, and I was lucky enough to have the perfect engine on hand. It was a brand-new (but 25 years old) William Olds & Sons 6hp Type "H" 4-stroke marine petrol (gasoline) engine.
|
The beautiful Wm Olds & Sons 6hp Type "H" - 25 years old, but still brand new! |
The engine was a nice match for the boat, being relatively light, very smooth-running, and designed to operate at the correct speed for direct drive without reduction gears.
|
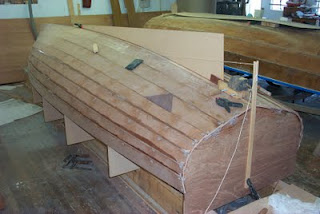
Planking complete, and working on shaft angles. The "skeg" is just a thin MDF pattern - much larger than the proper skeg would end up being. Note the essentials - a string-line and a calculator! |
Construction proceeded well, although we changed the lining-off of the planking compared with what had been suggested on the plans. Lining-off is a matter of taste and does not have any structural impact on the boat. It is amazing just how much a millimetre of change in a line can alter the aesthetics of a hull. The thing is to trust your eye.
|
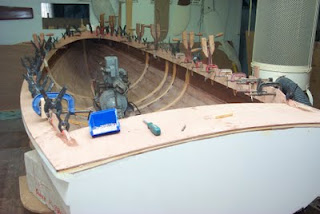
Engine installed and the coaming being laminated into position. Lamination of the coaming used up lots of clamps. The shape was quite complex, as it had to take into account the hollow sheer-line and the substantial deck camber across the foredeck |
I did a full-size lofting of the lower part of the hull in order to calculate the propeller shaft line and to draw up the engine mounts. The skeg was completed and attached before the boat was turned upright.

|
Most of the construction work completed, and awaiting details such as the rudder and the final engine installation. |
|
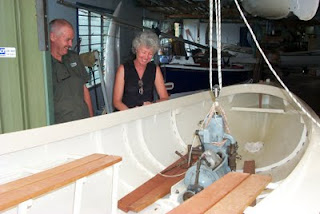
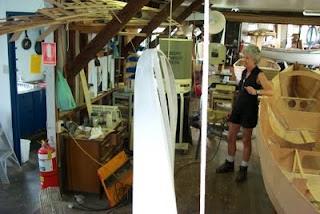
Doug and Rhonnie looking relieved after lowering the engine into place for the final time! |
|
This is the roof framework to carry the canvas-work over the cockpit. Lots of curves and bends so that it mirrors the sheer-line and shape of the boat. |
|
This photo taken during painting of the roof framework shows how complex the shape was to construct. This was my design - not part of the plans |
|
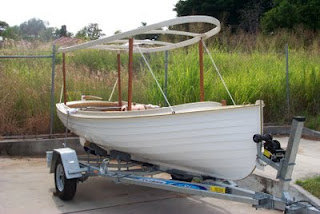
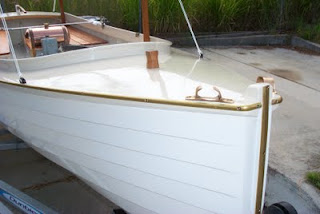
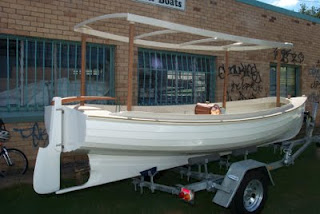
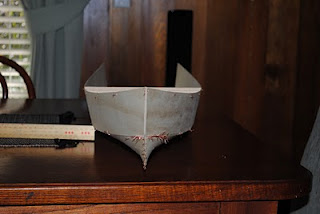
The finished boat, but without the tailored canvas sunroof. The four uprights were able to fold down, and were easily detachable |
|
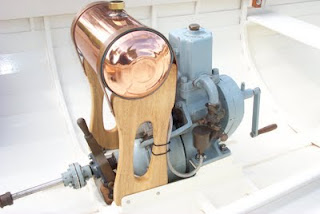
Simple engine installation, as befits such an elegant craft |
|
Oiled floorboards were individually spiled to shape, and we stamped them with numbers to aid re-installation when required |
|
Details of deck arrangement and brass rubbing strips |
|
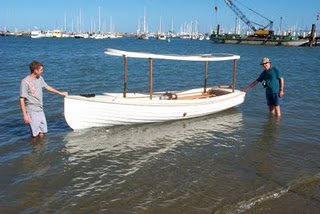
"Secret" launching before owner pick-up. |
|
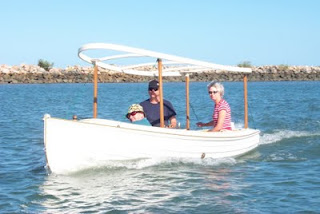
Power trials with engine at a low throttle setting. The easily-driven hull moved nicely with the engine running gently and quietly. This photo was taken before we had installed a foreward thwart, which accounts for Doug's head being so low! |
|
Here you can see the propeller and the rudder arrangement (as well as some of the local artwork on my workshop walls) |
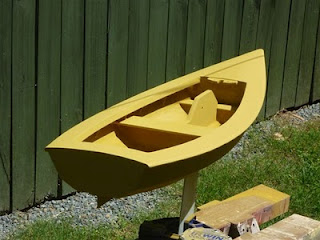
The end result of this job was a simple, efficient and satisfying boat - everybody was happy.
_______________________________________________________
The vast majority of my plans customers seem to be first-timers, and the building process - particularly visualisation - can be quite intimidating. Without any shadow of a doubt there are three primary aids in making a good start: -
- reading the correct text books (be extremely cautious about internet forums);
- spend plenty of time studying the plans;
- build a scale model.
The first two are self-explanatory, and I provide a recommended reading list with my plans, and try to make the plans detailed, supported by a comprehensive set of instructions.
|
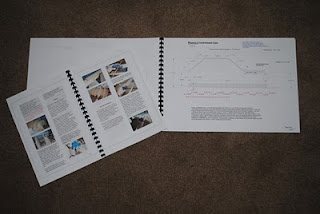
Phoenix III plans - 30 sheets of A3 drawings and 50 pages of illustrated instructions. |
Making a scale model is relatively simple if you follow the plans of the full-szed boat. The model doesn't have to be a masterpiece, but should follow exactly the sequence of constrution as specified in the plans.
Sometimes I build an exact replica using scale thickness plywood and scale thickness lumber of the same density as the full-sized boat. This allows me to test trim, stability, flotation and other elements of the design. At other times, I model only a section of the boat to examine things such as panel developments and curvature.
|
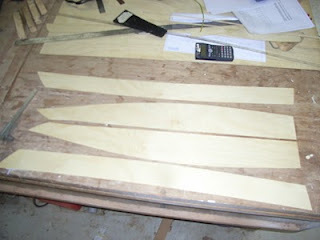
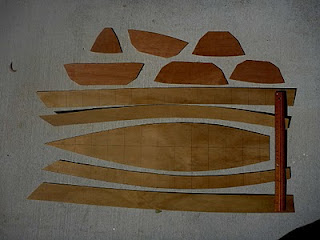
Hull panels for my Three Brothers design cut from 1.5mm Hoop Pine marine plywood to produce a 1/8th scale model. |

|
Scale stitch-and-glue process |
|
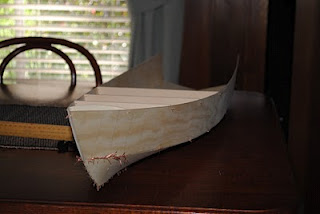
Hull panel developments being tested. |
|
Anticipated shape confirmed as being developable |
Sometimes people find it difficult to locate scale thickness plywood, but using balsa or other timber can still produce a worthwhile model for shape visualisation, and to help one understand the construction process.
My good friend Doug Laver is building a model of First Mate just for the fun of it. He intends sailing the boat using radio control, and has replaced the centreboard with a ballasted fin keel to make up for the lack of crew weight out on the gunwale.
|
Dougs First Mateparts cut at 1/5th scale using plywood |

|
Lots of little clamps in use |
|
Ballast keel inserted in centreboard case from below |
|
First Mate waiting for her lead ballast and her rig |
Modelling may appear to be a time-consuming business, but in the long run it usually saves time - and it is fun!
|