
 Custom Search
|
|
| sails |
| plans |
| epoxy |
| rope/line |
| hardware |
| canoe/Kayak |
| sailmaking |
| materials |
| models |
| media |
| tools |
| gear |
 |
 |
| join |
| home |
| indexes |
| classifieds |
| calendar |
| archives |
| about |
| links |
| Join Duckworks Get free newsletter Comment on articles CLICK HERE |
|
|
| 50th Anniversary Boat Build - Part One |
by Jeff Jouett - Houston, Texas - USA |
Part One - Part Two - Part Three The goal is the Texas Water Safari in June of 2012. The prize for reaching my goal is walking up the steps in Seadrift, Texas and earning my second patch as a competitor in the event. The Texas Water Safari (TWS) is a 260 mile canoe race that starts in San Marcos, Texas and finishes in Sea Drift, Texas. You can learn more at https://www.texaswatersafari.org I completed my one and only attempt in the TWS with my friend Paul Solomon in 2001. One thing that ran through my mind continually during the race was that I would like to complete the race in a boat that I made. That thought has stayed with me through the years and I'm finally making the time and effort to work towards that goal with the 2012 Texas Water Safari being the 50th anniversary of the race. It should be an incredible year for the TWS and the perfect motivation for me during this build. I am very fortunate to live in Cypress, Texas which is also home of Skip Johnson who is an adventure race canoe design guru. Skip has let me tag along in one of his boats during the Colorado River 100 and he's even mentored me in making a double blade paddle which I used during that race. Skip designed a solo canoe for me in 2006 per my specifications. I gave him my average weight and my height with the idea that I wanted a fairly fast boat but also had decent stability. The last thing I need is a very fast boat with minimal stability. 180 miles into the race with the inability to keep the boat upright due to fatigue is pointless. I will be writing about my boat building experience in several parts. The first will be the making of the strongback. Initially I was going to make a 2-3 person canoe that is 24' long and designed by Gerald Kennedy of https://www.theoldmansboats.com. My strongback is made to accommodate the longer boat so it's overkill for my solo boat which is around 19' long. I used the ladder style design that I learned from Gerald. My first dilemma was where to build the boat. I have a big shop here at work, but didn't want the distraction of having it here and also potentially having it get in the way over time. I secured a space near my house so it will double as storage and a shop. One issue with building a 24' long strongback is the space it takes up when not being used. I decided to make it so that it breaks down if desired for storing. I built the strongback at work since I had more room and it would be a good test of how well it breaks down. It came apart easily after completion and transported in the back of a truck with no problems. The reassembly went quickly too. The first step in my process to was to figure out how I wanted to build the strongback. I use the computer daily for my job so I used my CAD system to draw up what was in my head.
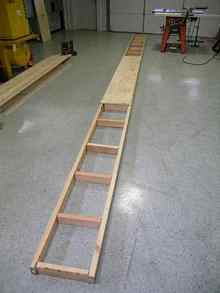
You may notice in the drawing and following pictures that the ladder frame part of the strongback doesn't go all the way to the ends of the plywood sides and top. The reason for this is because the shop space is barely over 24' long. If the ends need to be trimmed for the overhead door to close, some simple cuts of plywood would do the trick vs having to cut through 2x4's. Once the strongback design met my criteria, I purchased the materials and cut out the pieces. I laid them out on the floor to get an idea of size.
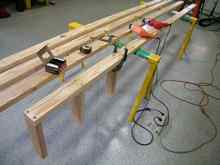
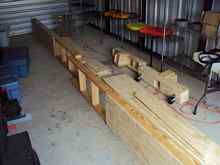
Once laid out I was amazed at how long it was. When beginning the first half of the ladder frame I did my best to keep everything as square and straight as possible. Using corner clamps to hold the pieces while drilling and screwing together did the trick.
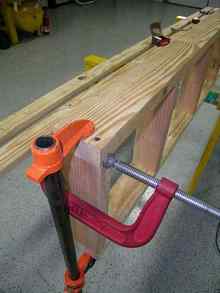
Once the cross pieces were screwed in place, I flipped the partial frame over and began securing the other side of the ladder. I used clamps as I went along so that the boards all stayed lined up side to side.
One half of the ladder frame is done, one to go.
With the second ladder frame half completed, it was time to start putting them together.
It should be noted that I used 2"x4"x12' boards for the length of the ladder frame pieces. 3-4" of each board was trimmed off so that when put together they wouldn't make a full 24' ladder due the length of the shop as mentioned earlier. The two ladder parts are joined with an overlapping 2"x4" board.
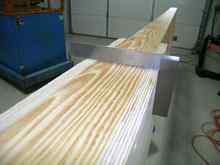
When screwing the side panels on, I took great care to make sure they were lined up correctly.
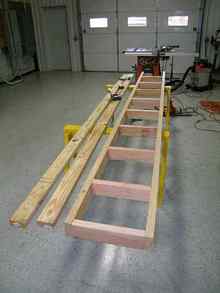
Before continuing, I placed one of the top pieces on just to check alignment.
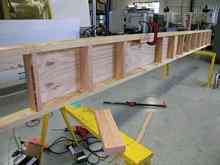
Everything looked good so the rest of the side panels were completed. The two side panels in the middle of the strongback were only screwed on so that they could be removed later. The side panels on each end (total of 4) were glued and screwed in place. The strongback is basically finished.
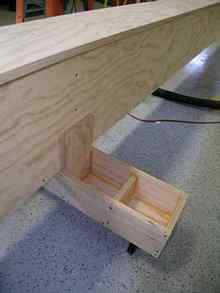
The top pieces won't be screwed on until it's been moved to the shop and reassembled. I wasn't sure at first if I would like the finished height. The leg detail was built to my original design.
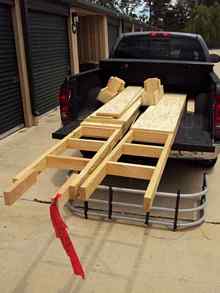
It turns out I wanted it higher so I made some spacer blocks. I'll follow up on the spacer blocks in my next submission as I never took any pictures of those. It was time to transport the strongback to the other shop, so the appropriate pieces were unscrewed and the form was broken down.
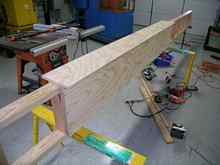
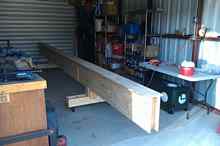
After unloading, the pieces were laid out ready to be re-assembled.
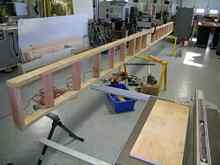
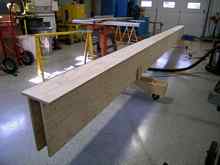
After the two main pieces and sides were screwed back together, the form was check for straightness and the top 3 pieces were finally screwed on.
The next step will be cutting the forms and mounting them in place. To be continued... |
 |